An Ultimate Guide to Glasp
Unlocking the Potential of Glasp: A Comprehensive Guide to Mastering its Features.
Introduction
Learning online can become frustrating when you have to switch back and forth between your learning platform (YouTube, web browser, etc.) and your note application. However, there is a solution to this problem, Glasp.
Glasp is a social web highlighter for highlighting information on any learning platform. This information can now be saved as notes and shared with others. Glasp is a free tool accessible by anyone and available on your PC as a web extension.
In this guide, you will learn all there is about Glasp. At the end of this guide, you will know how to navigate the dashboard, summarize text and videos and highlight valuable information online.
Prerequisites
The following tools are needed to utilize this guide:
- Google Chrome on your PC.
What is Glasp?
Greatest Legacy Accumulated as Shared Proof (Glasp) is a free social web highlighting extension. It allows users to highlight helpful content on the web. This content is automatically curated on the Glasp dashboard of the user. It can later be shared on multiple platforms like Twitter, Slack, etc.

Figure 1. Glasp.
Glasp has multiple features, including creating highlights for important information and summarising blogs/newsletters. It also allows users multiple color-highlighting options, making it a user-friendly tool.
Advantages of Glasp
The following are some advantages of using Glasp:
Learning and taking notes simultaneously: Learning on the web can now be more straightforward with Glasp. You can learn while concentrating and taking notes simultaneously without switching back and forth between multiple screens. This feature increases your learning pace.
Public learning: With Glasp, you can save notes to be seen by followers. As a result, you become more accountable for your knowledge. It is also an effective way to invite like-minded individuals to your learning space and thought process.
Safe note-keeping: With Glasp, organizing notes has never been easier. Notes can be tagged, and this is a safe and organized way of keeping information related to a particular subject.
Faster information gathering: With Glasp summarising feature, you can now summarise a YouTube video into text form. Utilizing this feature makes learning faster as you don't have to watch the entire video to get the information.
Getting Started with Glasp
Glasp is an essential tool for everyone. The following sections will get you started with using this tool.
Sign Up
You can use the following steps to sign-up for Glasp:
Open the Google Chrome web browser.
Visit the official Glasp webpage.
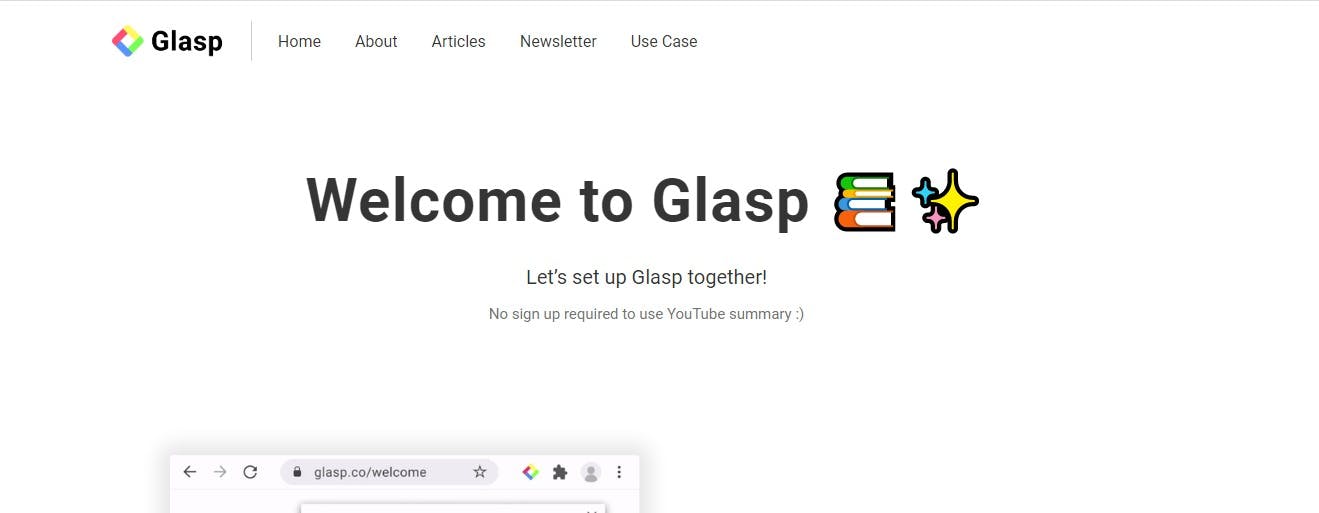
Figure 2. The Glasp welcome page.
Click on Sign up (beta).
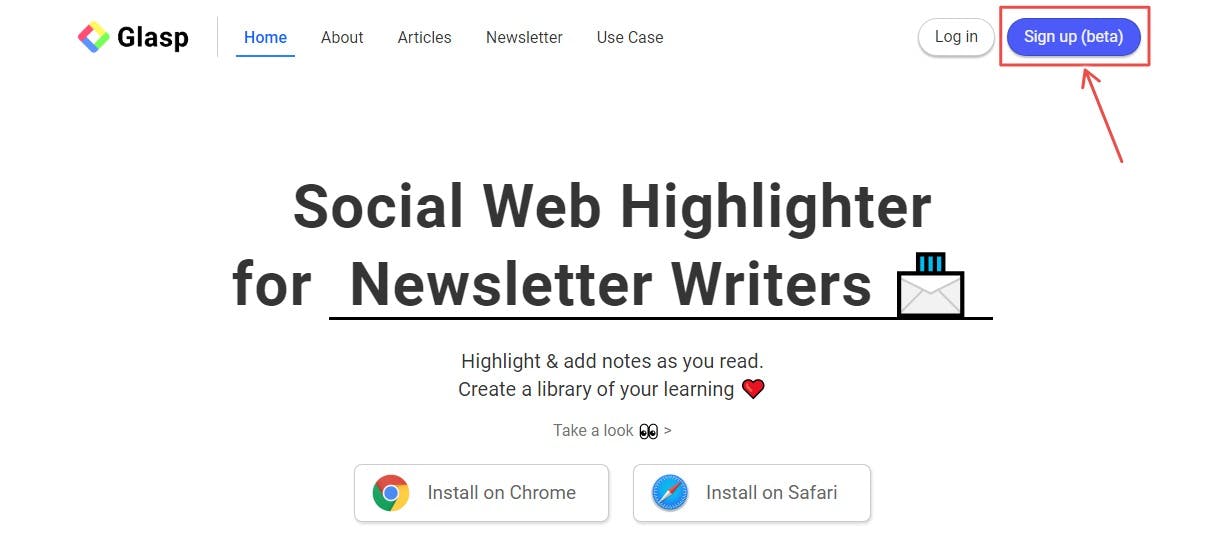
Figure 3. Glasp sign up.
Click on Continue with Google.

Figure 4. Continue with Google.
Choose a Google account to use for signing up.
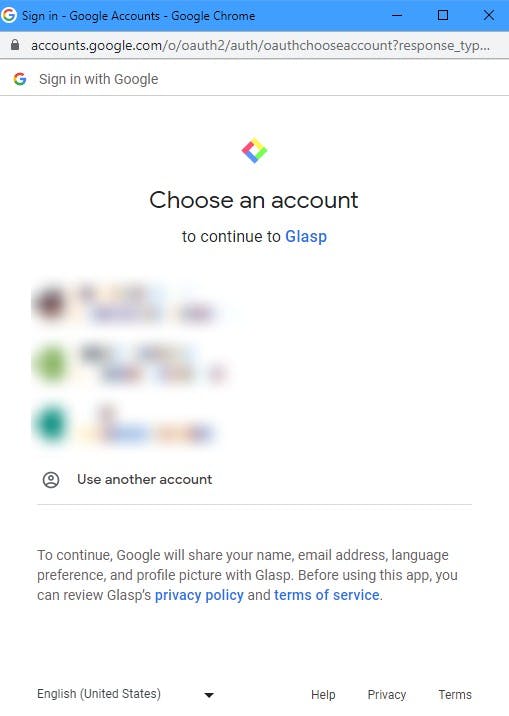
Figure 5. Authenticate with Google.
To confirm your account, navigate to your email address and verify your account. Once you do, you will see a confirmation screen.
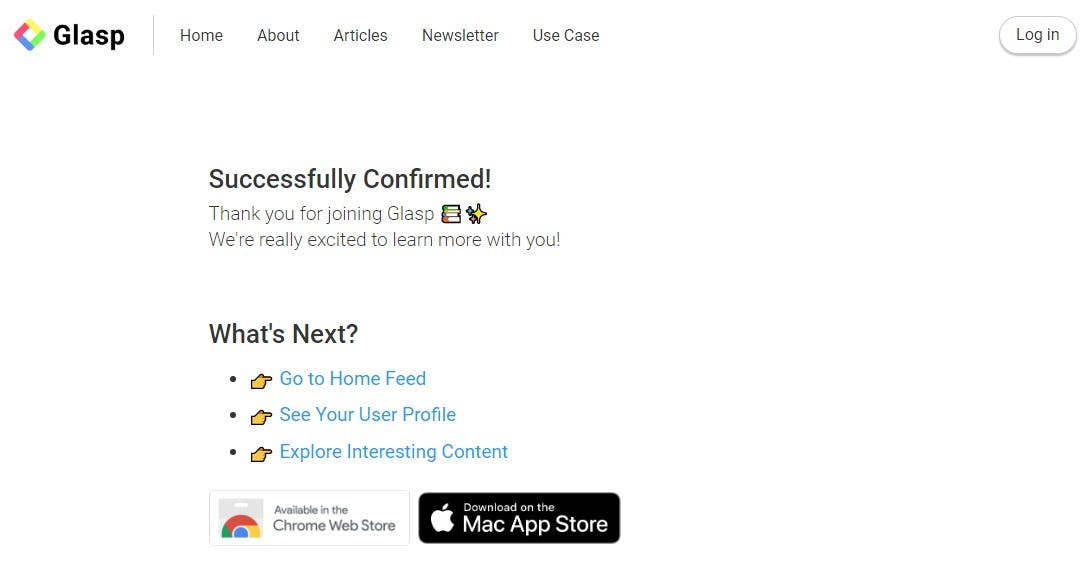
Figure 6. Sign up successfully.
With this, you have completed the sign-up process. To see your dashboard, go back to the Glasp webpage.
Choose ten favorite topics you are interested in and save them.
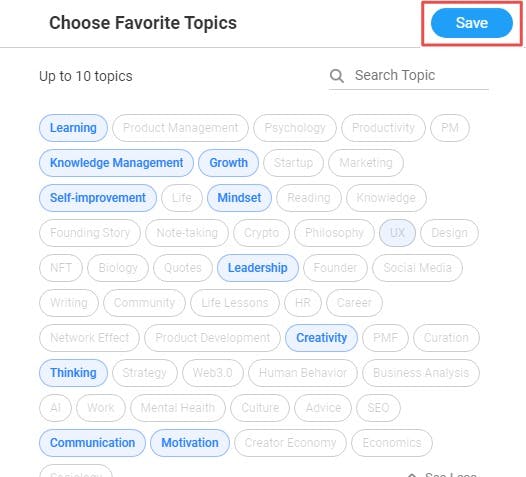
Figure 7. Select your favorite topics.
You should see the Glasp home page as seen below:
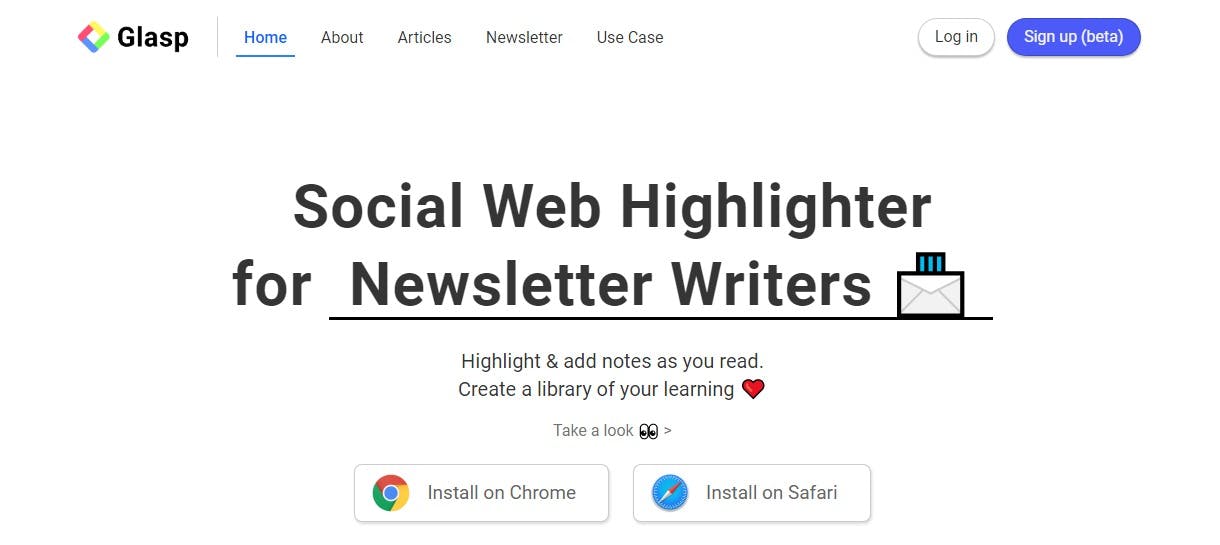
Figure 8. The Glasp home page.
Installing the Glasp extension
You can only fully utilize Glasp with its extension installed on your PC. However, this extension is only available in Google Chrome and Safari web browsers.
Google Chrome
To install the Glasp extension on Chrome, follow the steps below:
On your Google Chrome web browser, go to the Glasp extension page.

Figure 9. Chrome web store.
Click on Add to Chrome

Figure 10. Add Glasp extension.
Click on the Add extension option at the prompt. It will download the extension.

Figure 11. Add extension prompt.
It will perform a check and add the extension to your browser.
Safari
To install Glasp on your macOS, visit the Mac App Store.
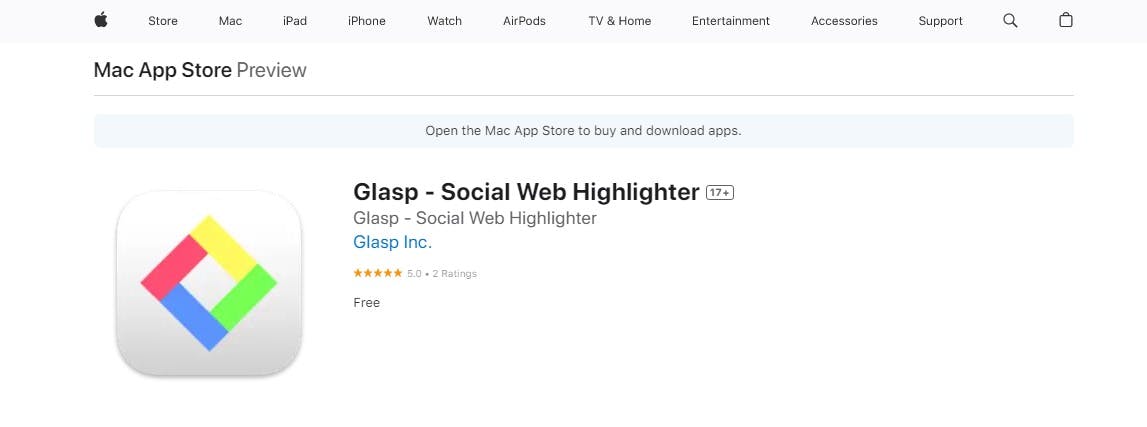
Figure 12. Mac app store.
Understanding the dashboard
Glasp has a detailed dashboard that contains all your highlights, information about you, and every other activity you perform using the tool.
The dashboard contains three (3) main sections: Home, My Highlights, and Explore.
Home
The home tab is the main section of the Glasp dashboard. It contains information about your topics of interest.
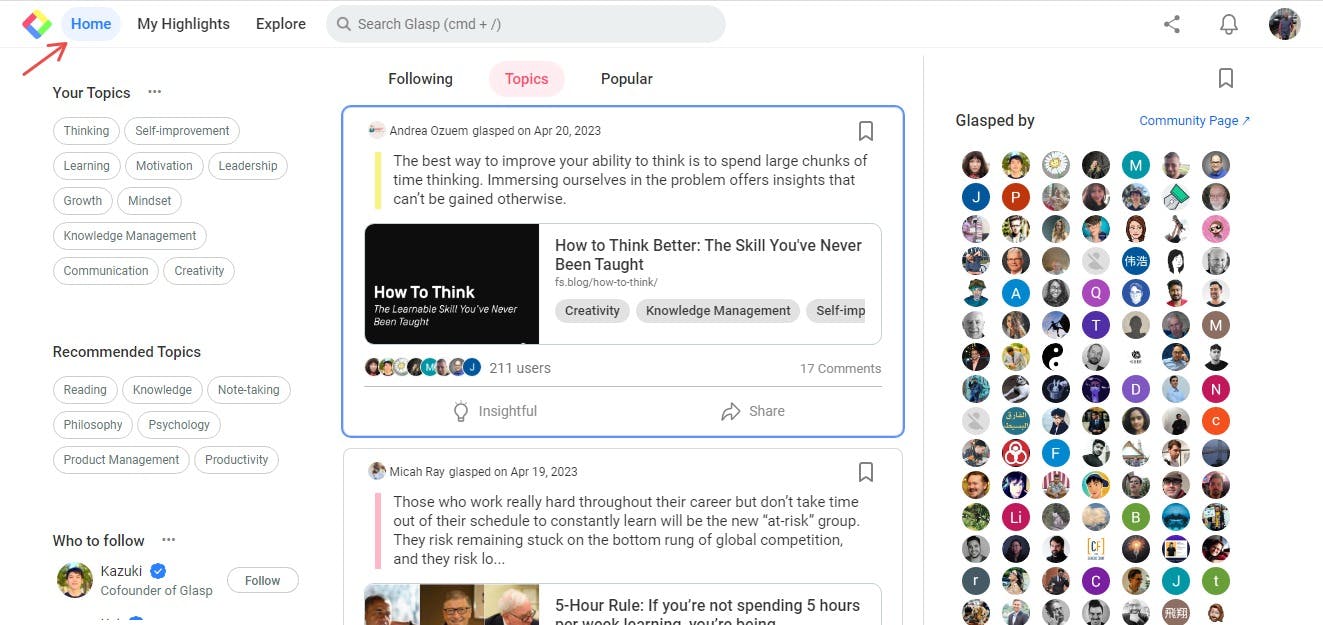
Figure 13. The Glasp home tab.
On the left, you have tags for your favorite and Recommended Topics.
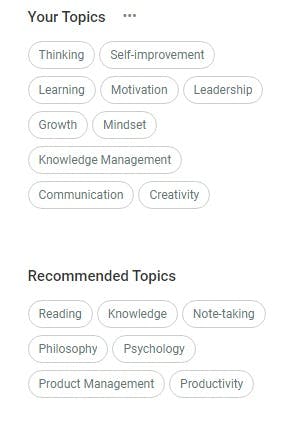
Figure 14. The left side of the home tab.
The middle contains highlights split into three tabs: Following, Topics, and Popular. These tabs include highlights about individuals you follow, highlights around your favorite topics, and popular tabs.
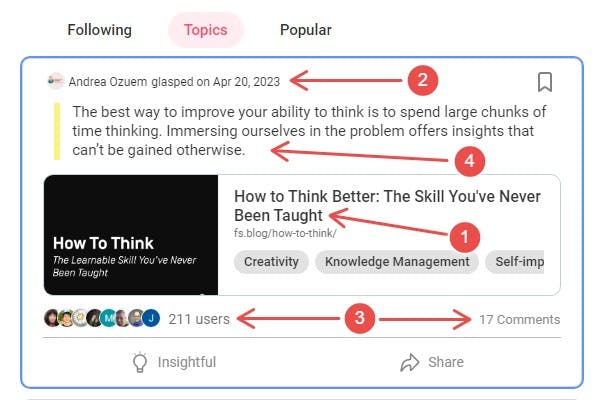
Figure 15. The center section of the home tab.
In each of these highlights, you can find the following information:
The article where the highlight was made
Information about the highlight, including the name and date it was Glasped.
The number of users using the highlights and their comments.
The note from the author of the highlight.
On the right side, you can see the users of the highlight. Also, you can see the Highlights and Notes with a summary using AI.
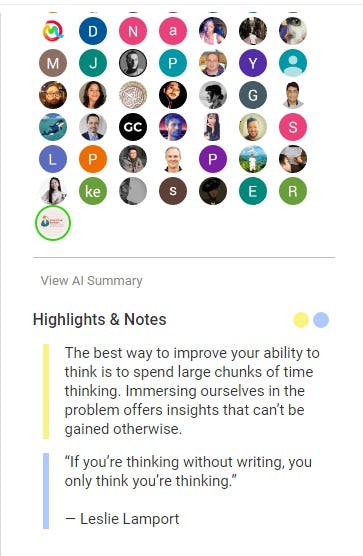
Figure 16. The right side of the home tab.
My highlights
In the highlights tab, you can view your highlights and track all your activity using Glasp.
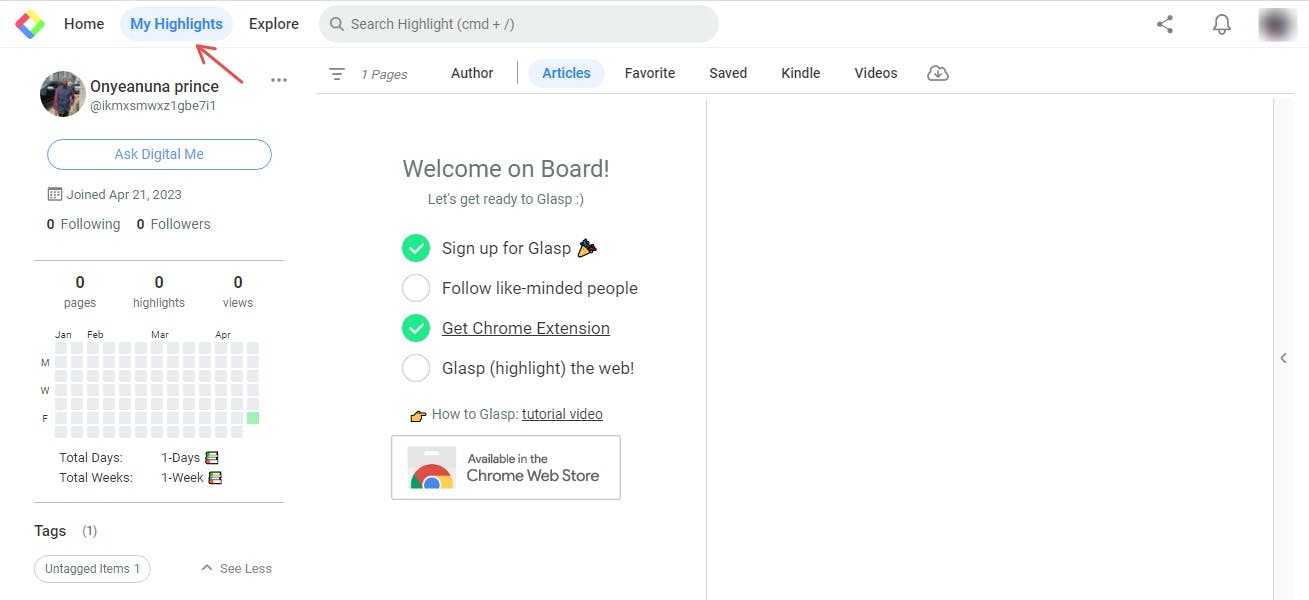
Figure 17. Highlights tab.
On the left side of the highlights tab, you can see all your information, including your number of followers, tags, and the date you joined Glasp. You can also see the number of pages, highlights, and views you have and track all your activities using the graph.
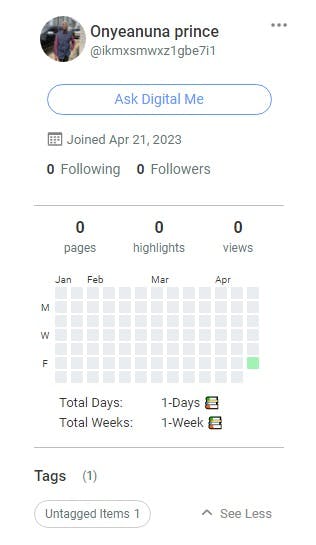
Figure 18. The left side of the highlights tab.
The highlights tab contains the following sections:

Figure 19. All tabs in the Highlight section.
Authors: When you have tagged an author, it shows in this tab.
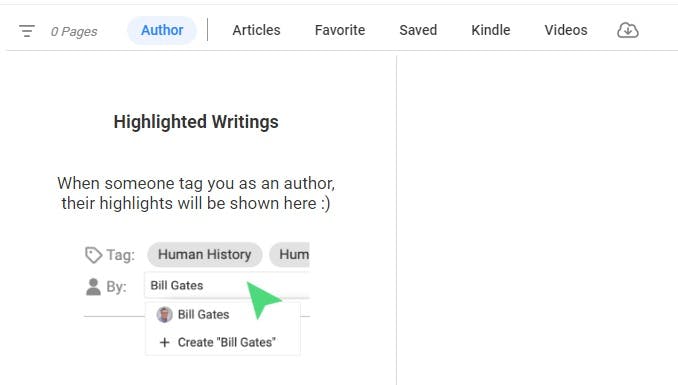
Figure 20. Authors tab.
Articles: This is where all highlighted articles are shown.
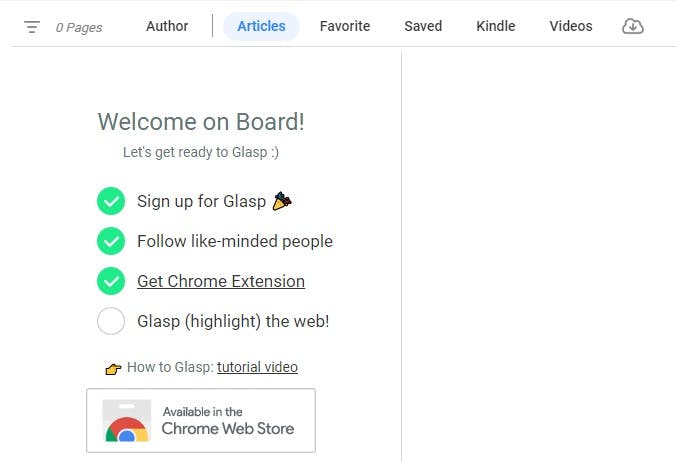
Figure 21. Articles tab.
Favorite: All your favorite highlights are kept in this tab.
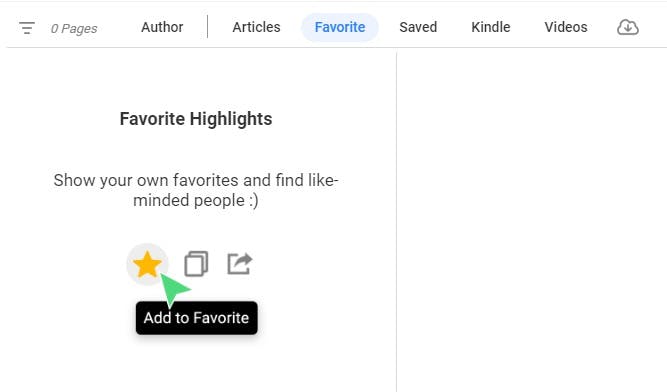
Figure 22. Favorite tab.
Saved: You can bookmark or save other people's highlights, and it will show here.
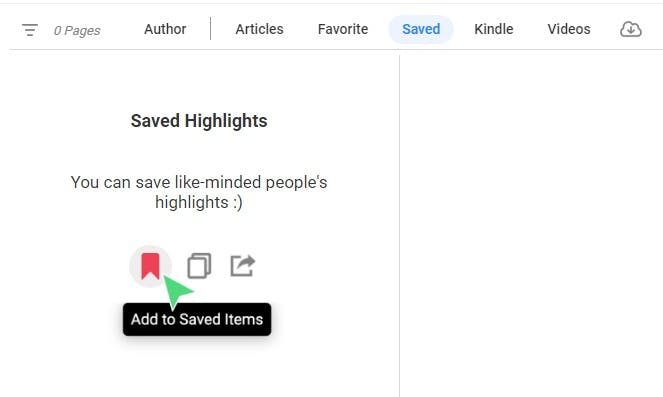
Figure 23. Saved tab.
Kindle: You can import all your notes from Kindle, which will show here.
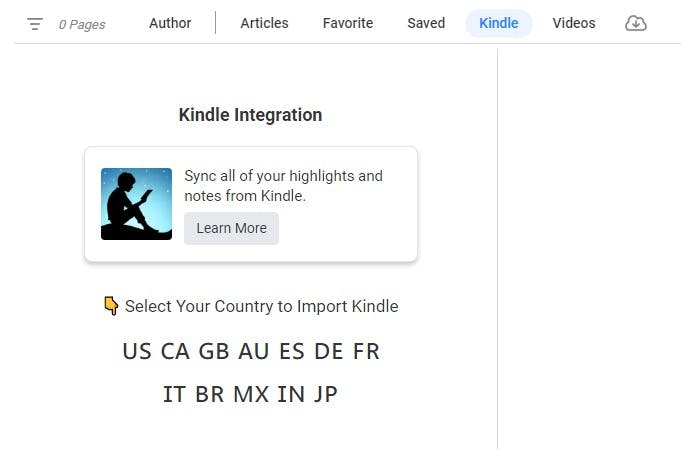
Figure 24. Kindle tab.
Videos: This tab holds all the highlights from YouTube videos
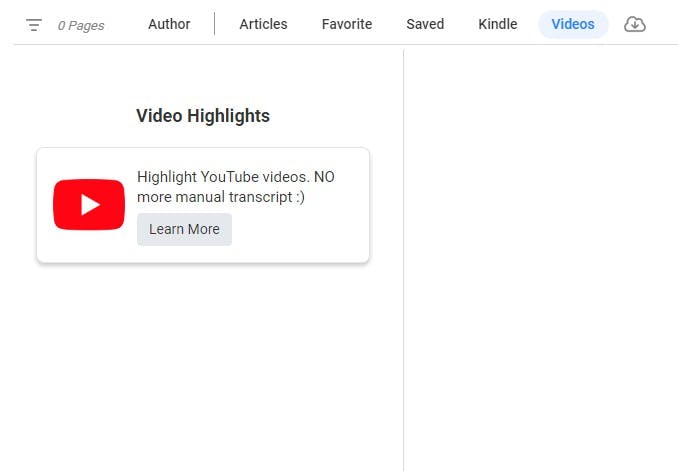
Figure 25. Videos tab.
Download: You can download your highlights using this tab. You can select the format you want to download the highlights.
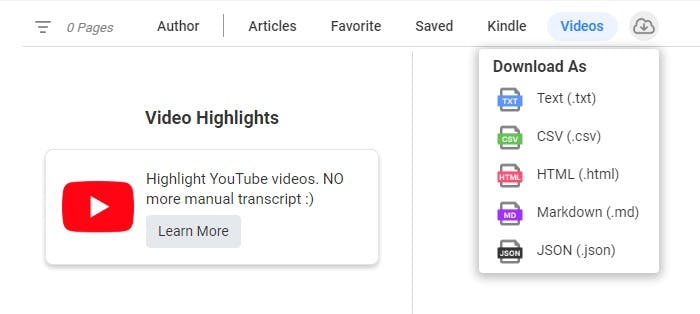
Figure 26. Download tab.
In the highlights section, you can edit your profile. To do it, follow the steps below.
From the My Highlights tab, click on the three-dot menu beside your name.
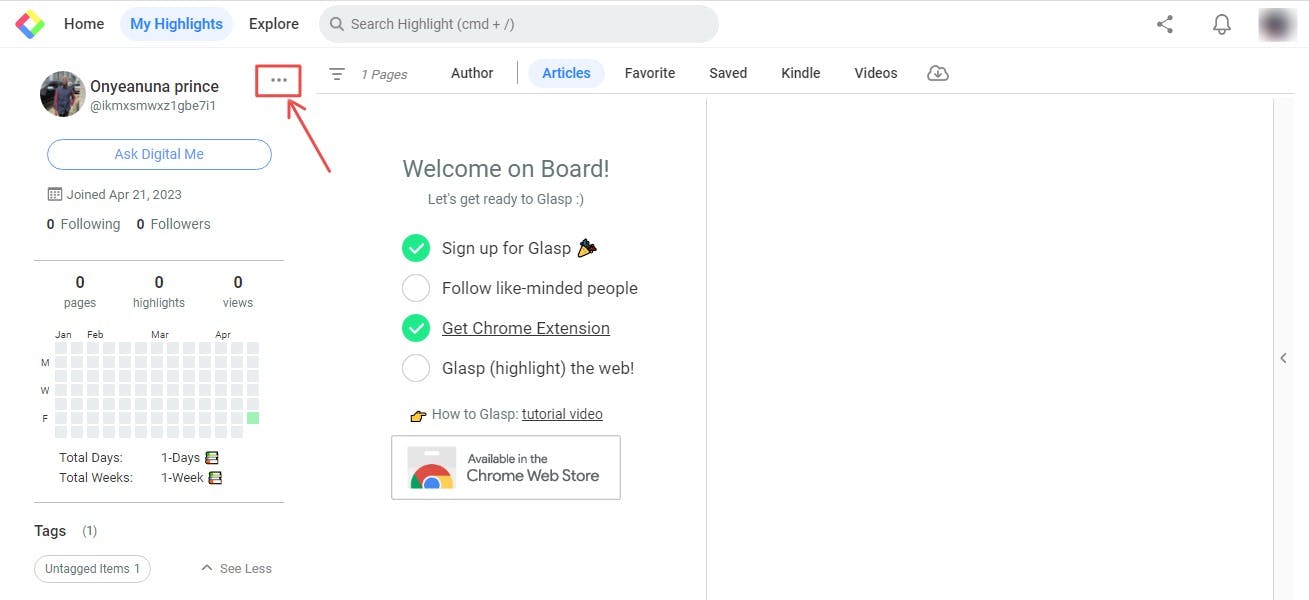
Figure 27. Profile menu.
Edit any necessary information.
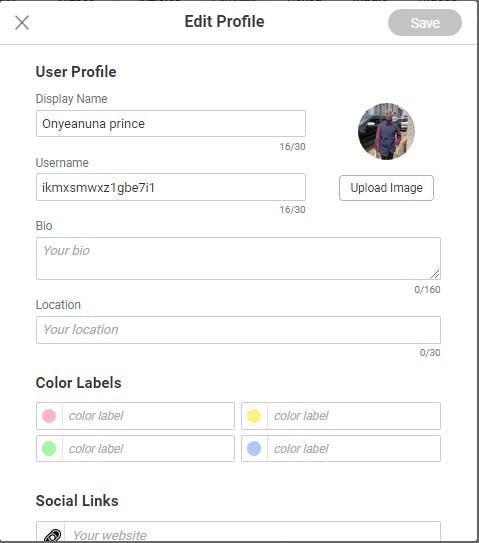
Figure 28. Edit profile.
Click on Save
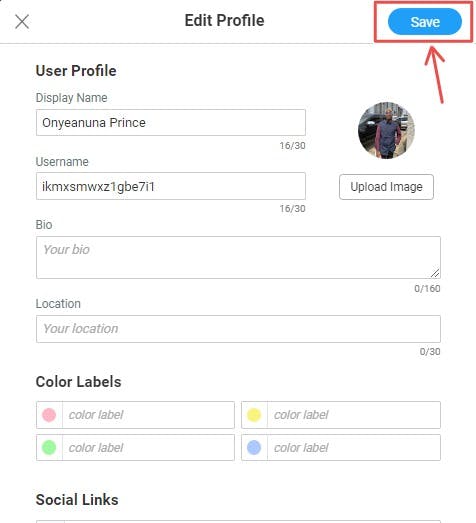
Figure 29. Saved edits.
Explore
You can search for domains, authors, and tags in this tab. You can explore the Glasp community in the Explore tab.
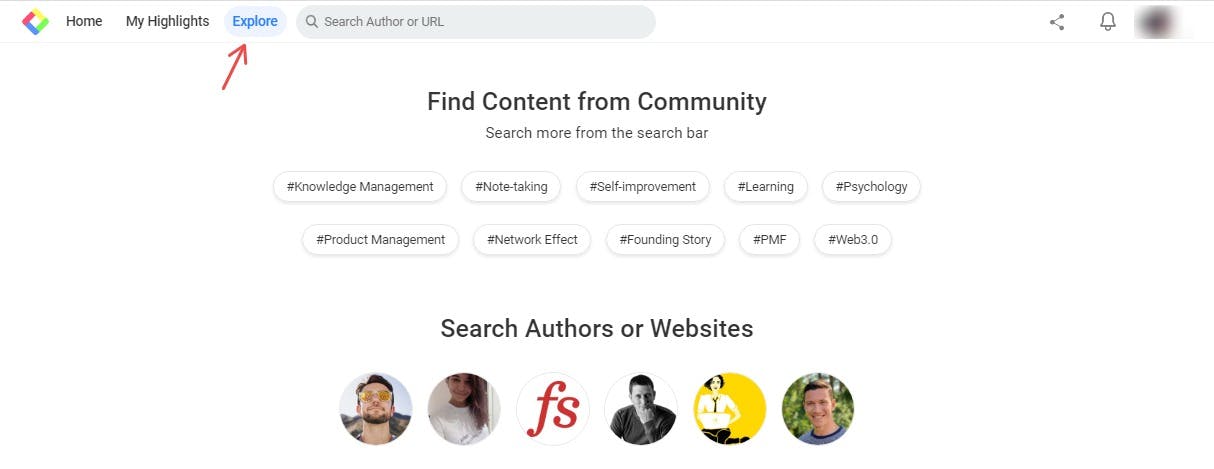
Figure 30. Explore tab.
Key features of Glasp
The following features can be used to enhance your learning experience by using a social web highlighter, Glasp:
Summarisation
Glasp makes absorbing relevant information easier and faster by providing a summarisation feature powered by artificial intelligence. This feature works on online information, such as blogs, newsletters, PDFs hosted online, etc., and videos on Youtube.
To summarise a text on a blog, use the steps below:
Highlight the text you want to summarise.

Figure 31. Highlight some text.
On your Chrome extension tab, click on the Glasp extension icon.
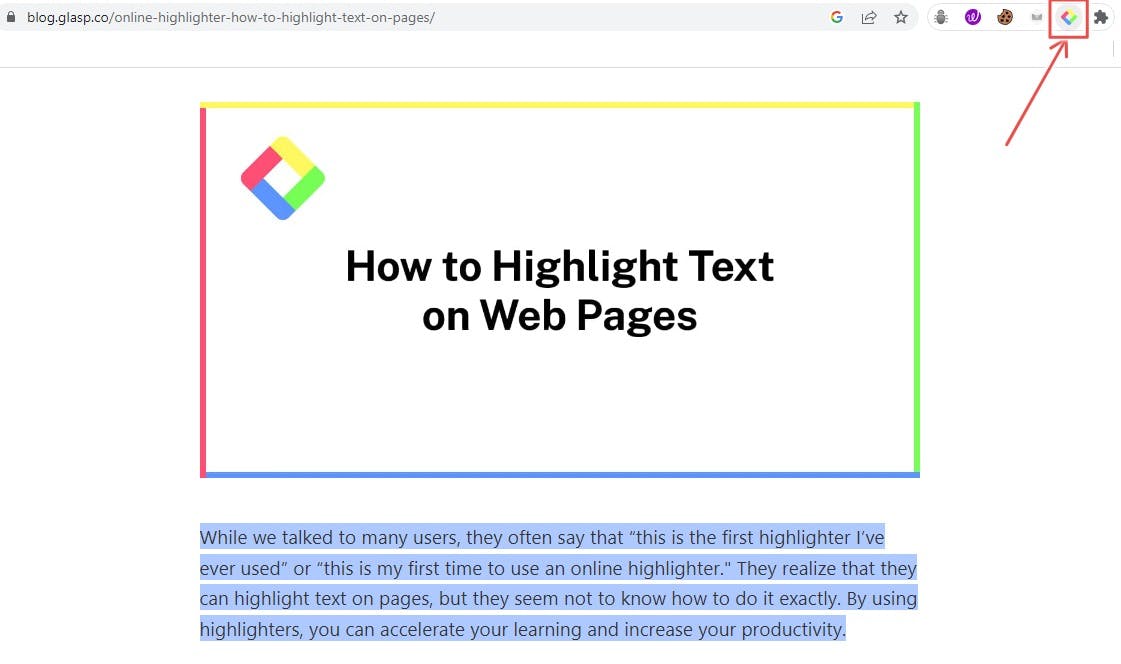
Figure 32. Glasp extension.
Click View AI Summary.
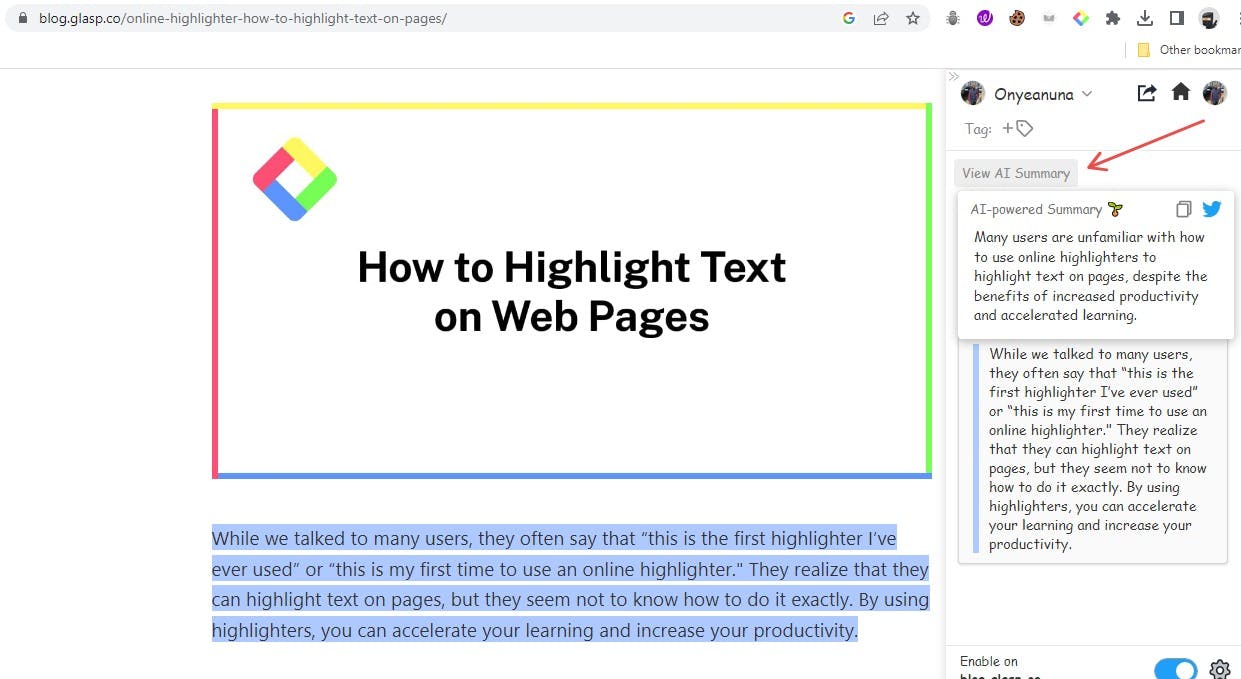
Figure 33. AI summary.
To summarise a video on YouTube, follow the steps below:
On YouTube, click on Transcript & Summary. It displays the video transcript.
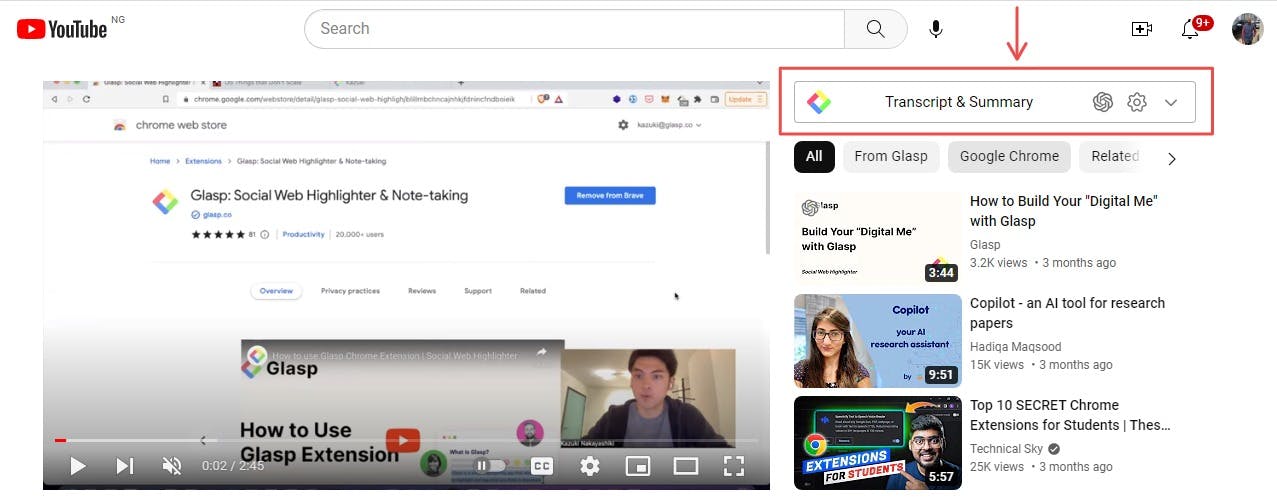
Figure 34. YouTube summary.
Click on the icon below to see a video summary using the transcript.
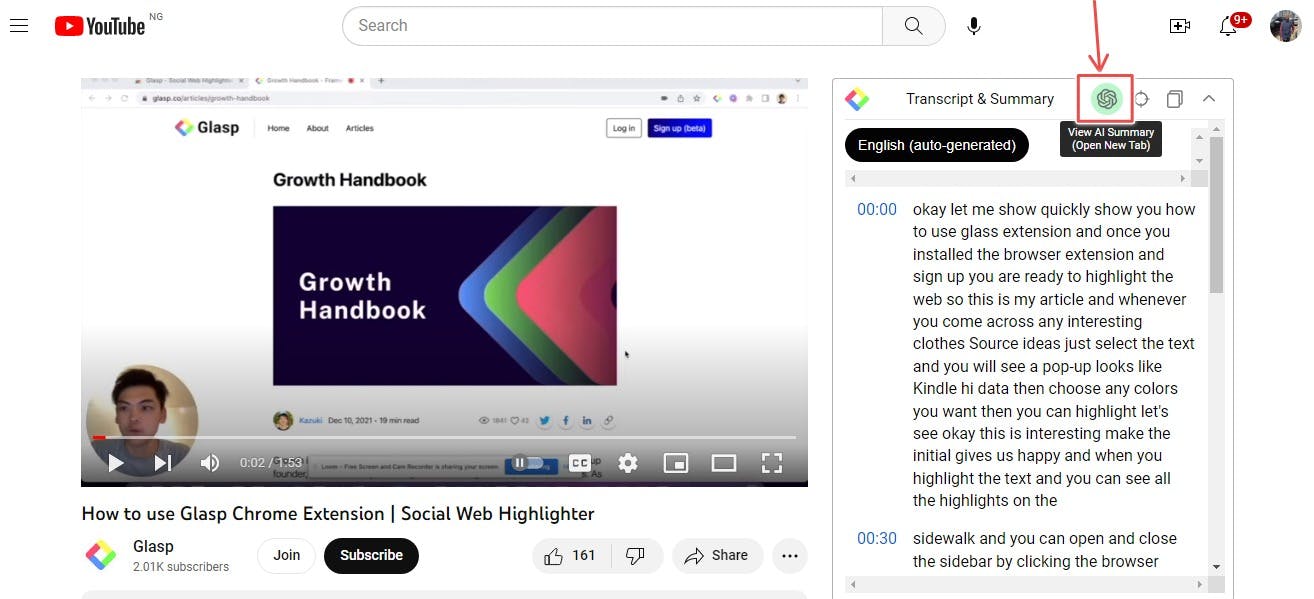
Figure 35. View AI summary Icon.
ChatGPT summarises the video.

Figure 36. ChatGPT summary.
Customization
In addition to summarising texts and videos, you can also decide to customize your settings.
To customize the preferences for your summary, follow the steps below:
In the Glasp extension, click the settings & help icon, and select the User Settings option.
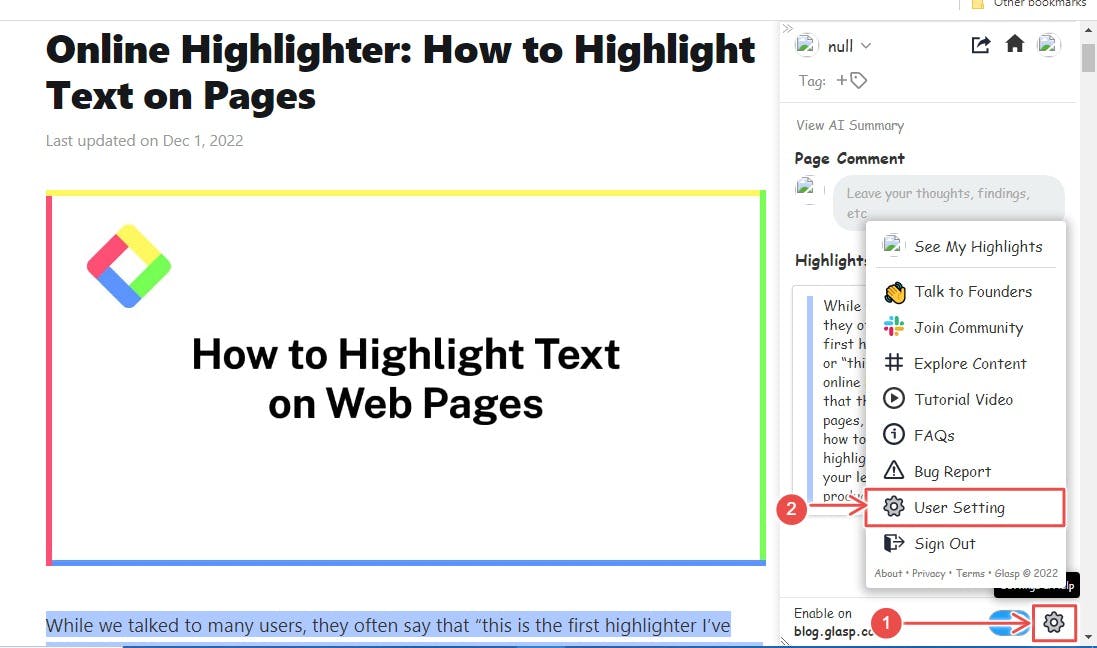
Figure 37. User settings.
Scroll to the Customize Prompt for the Summary section.

Figure 38. Summary settings.
Customize the summary settings. Here, you can decide how many bullet points you need for the summary.
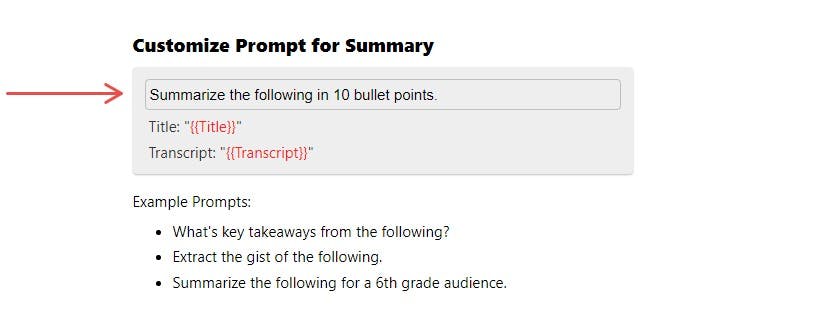
Figure 39. Customize the prompt for the summary.
Sharing
You can share your highlights with your friends on social media, embed them on your blog or newsletter, and share the link anywhere on the internet.
To share your highlights on Twitter, follow the steps below:
Click on the three-dot menu icon on the highlight.
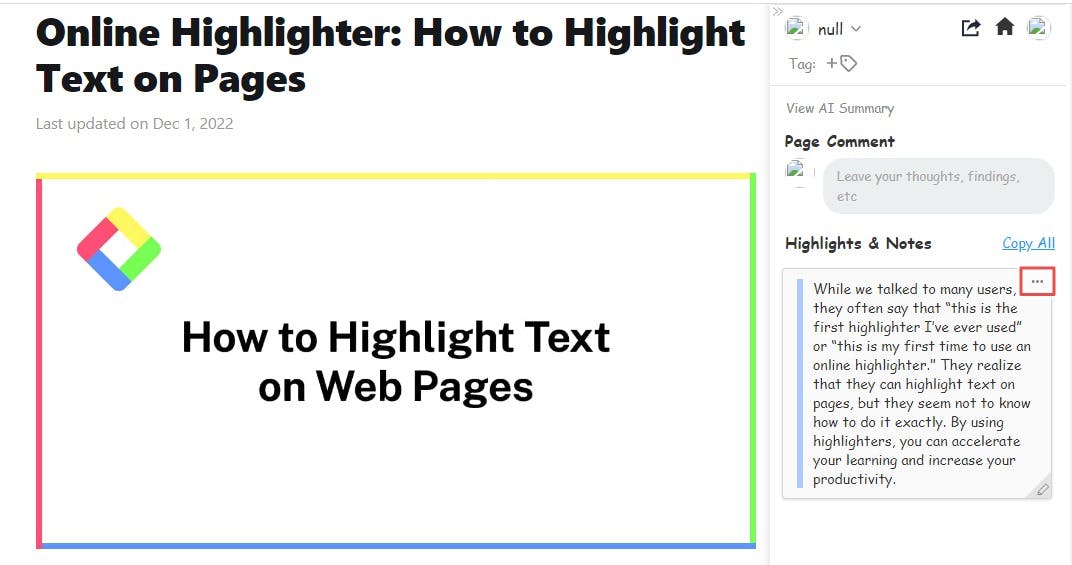
Figure 40. Highlight menu.
Select Share on Twitter. This will authenticate you and open a draft to post your tweet.
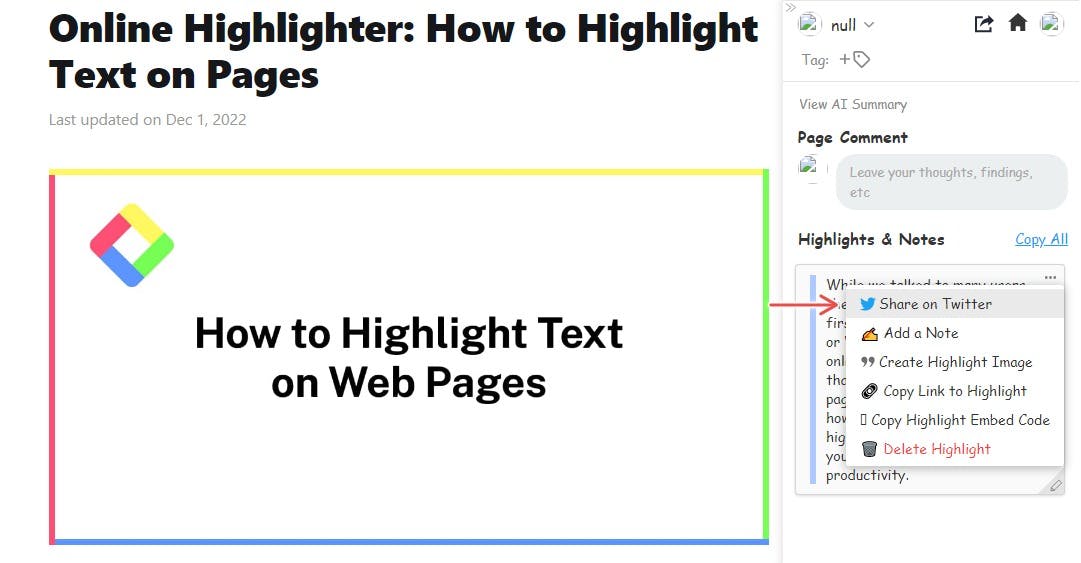
Figure 41. Share the highlight on Twitter.
Edit your tweet and share the highlight.
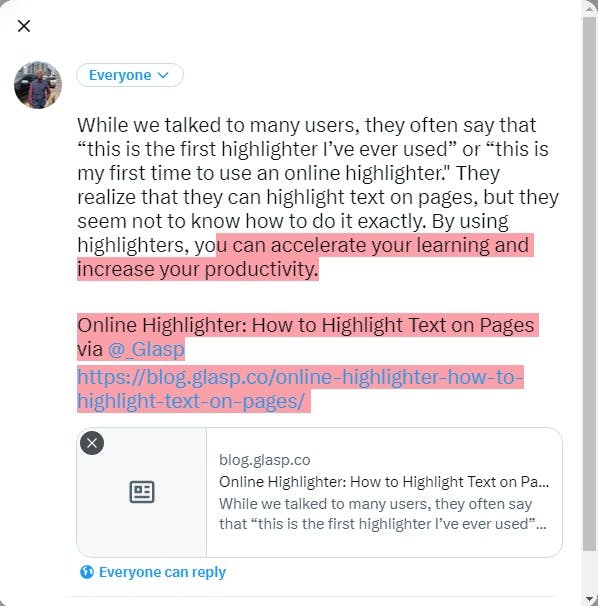
Figure 42. Post on Twitter.
You can also embed your highlights in your blog/newsletter. To do so, follow the steps below:
Click on the menu in the highlight.
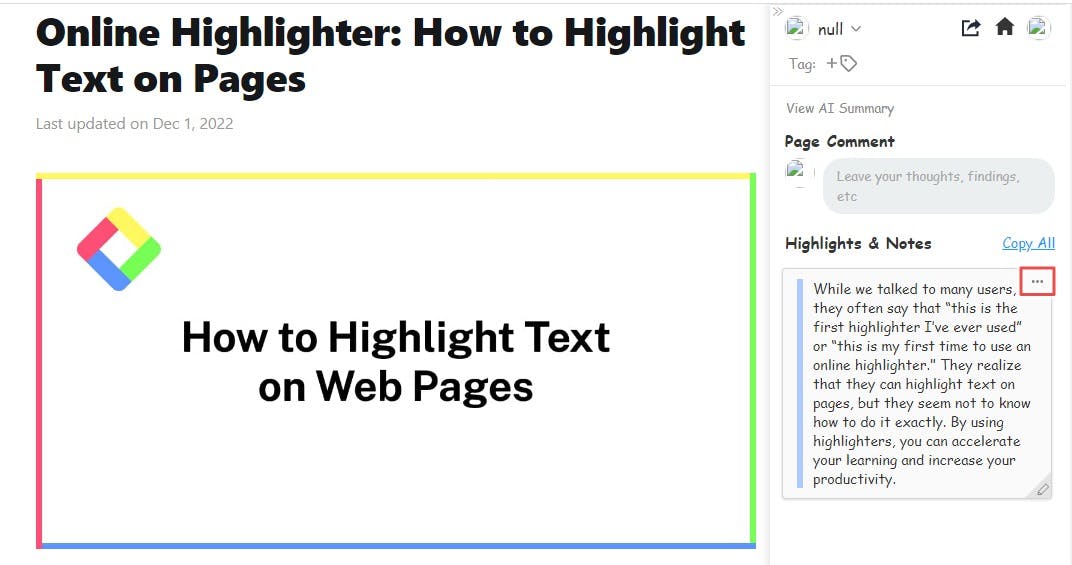
Figure 43. Highlight menu.
Select the Copy Highlight Embed Code option.
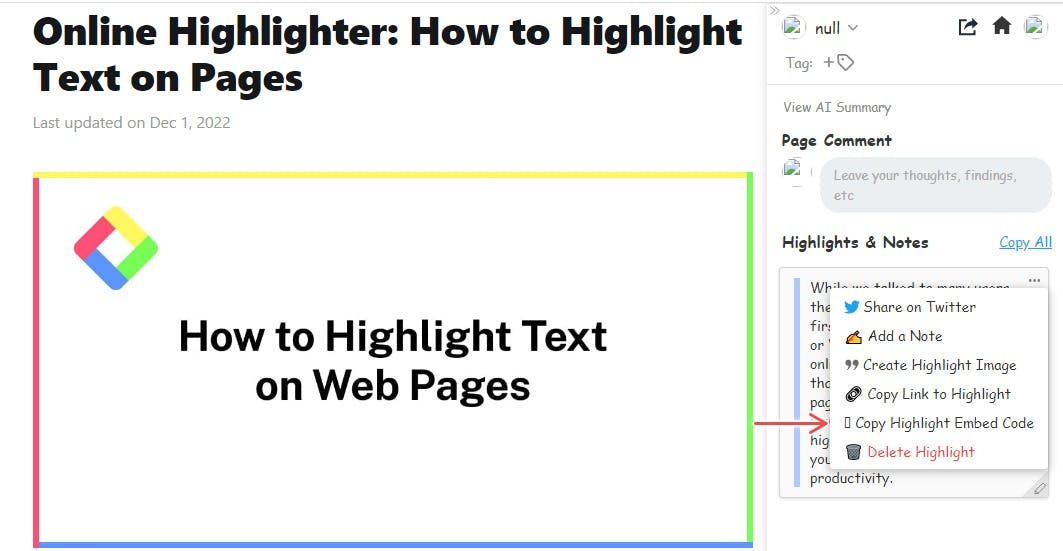
Figure 44. Copy highlight Embedded code.
Paste the embedded code on your blog.
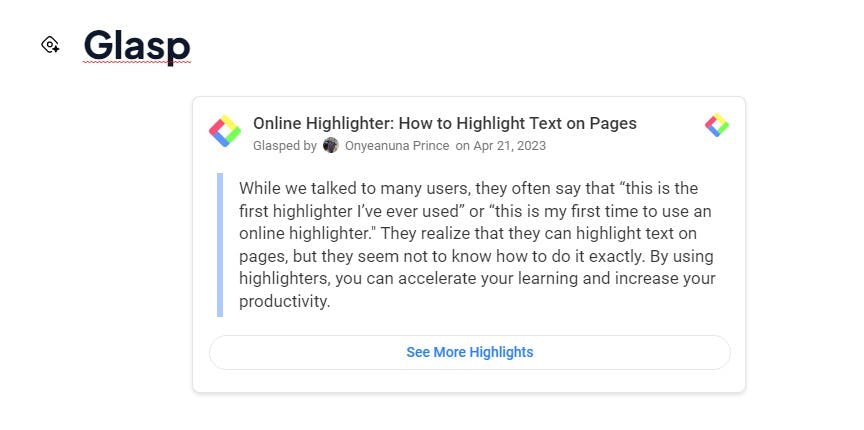
Figure 45. Embed the link into the blog.
Highlighting
This is a primary feature of Glasp. It allows users to highlight key points and take notes. You can also have different colors for your highlights.
To highlight a sentence on a blog and leave a note, follow the steps below:
On the blog, highlight the desired sentence.

Figure 46. Highlight some text.
Choose the color you prefer.
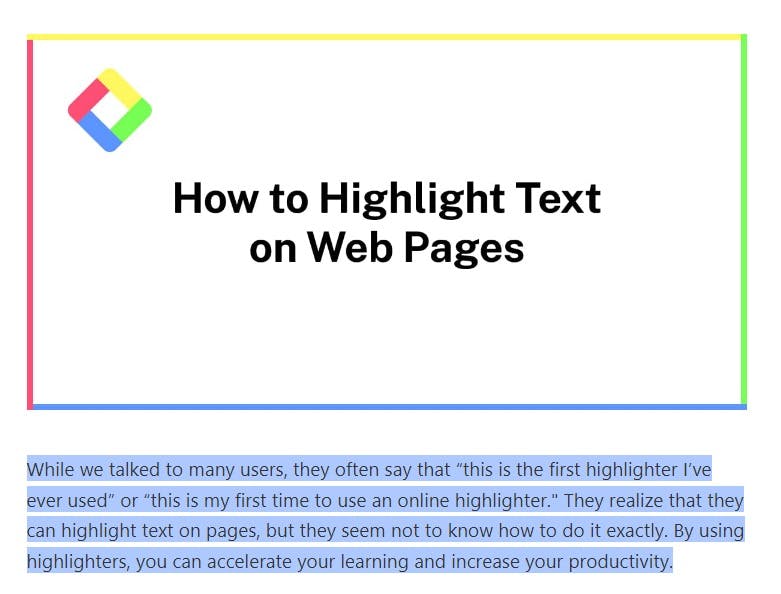
Figure 47. Select your desired highlight color.
Click on the Glasp extension to display all highlights.
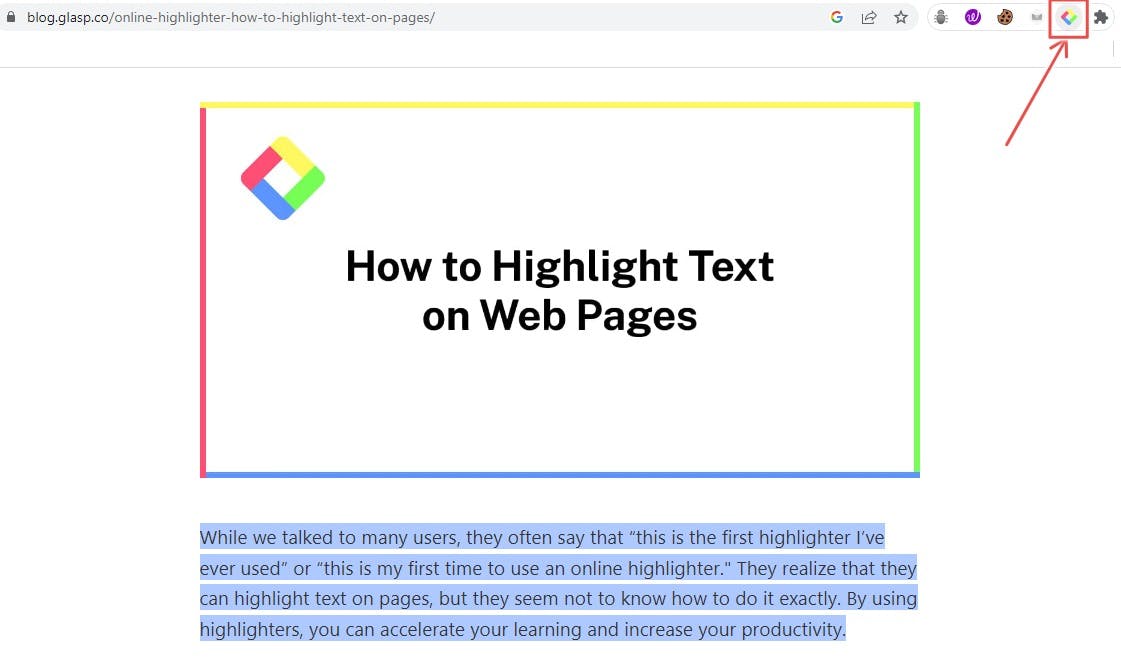
Figure 48. Glasp extension.
On your highlight, click on the menu and select the Add a Note option.
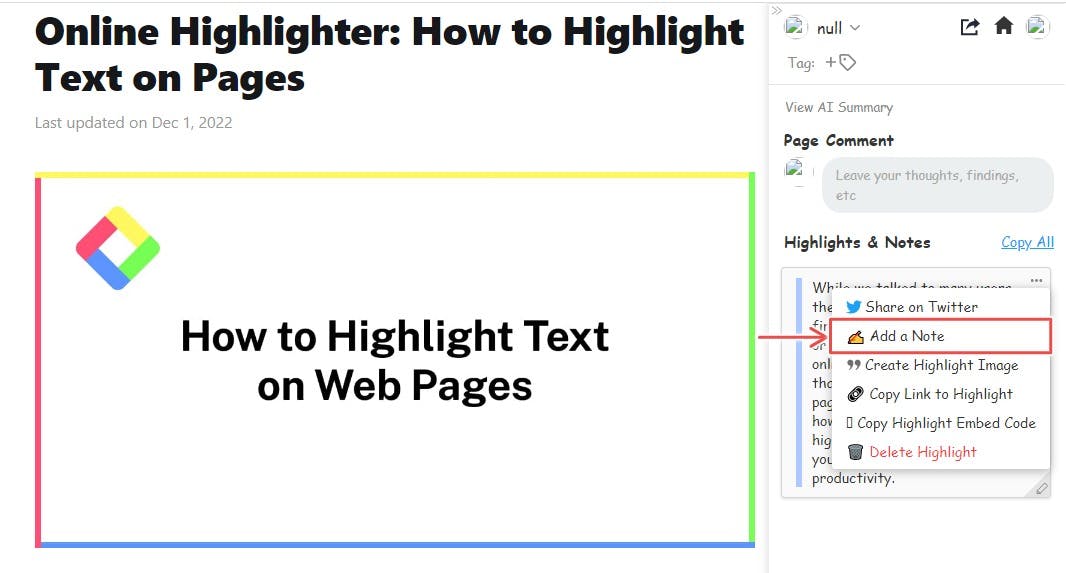
Figure 49. Add a note to highlight.
Underneath the highlight, you can see the note.
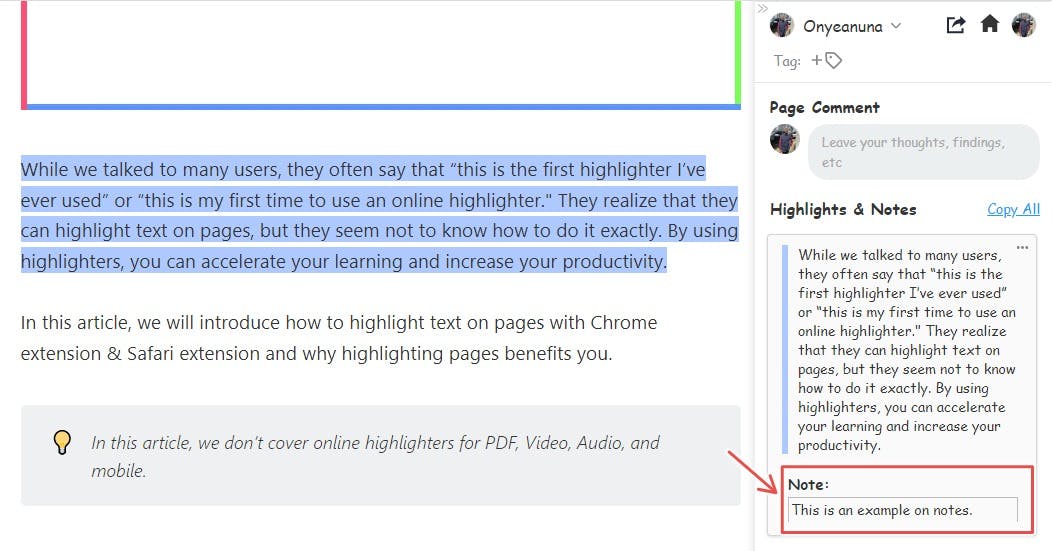
Figure 50. Glasp Note.
You can view this information in more detail on your Glasp dashboard. To do it, follow the steps below:
Visit the Glasp dashboard in your browser.
Click on the My Highlights tab.
You can now see a descriptive view of all your highlights.
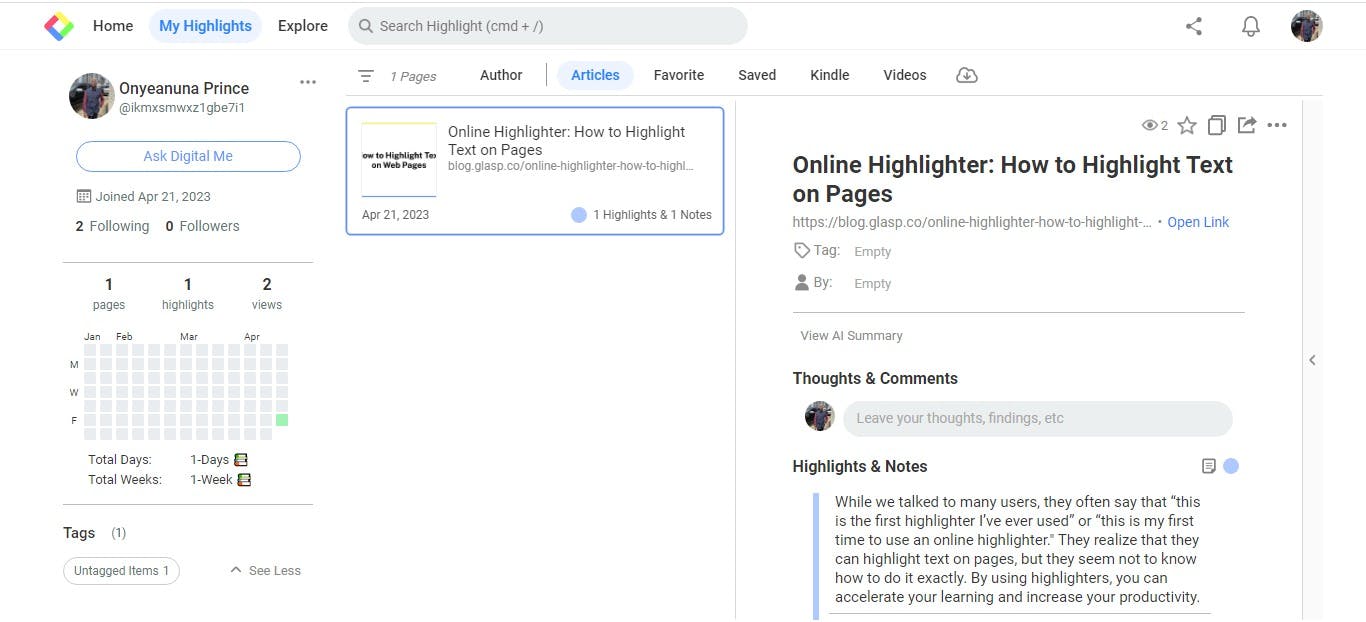
Figure 51. A Detailed view of the Highlight tab on the Glasp dashboard.
Language support
You can get the summary prompt in multiple languages. For now, Glasp can only support multiple languages for the prompt.
To change the language of your prompt, use the steps below:
On the User Settings tab, navigate to Language.

Figure 52. Language section of User settings.
Select the language of your choice.
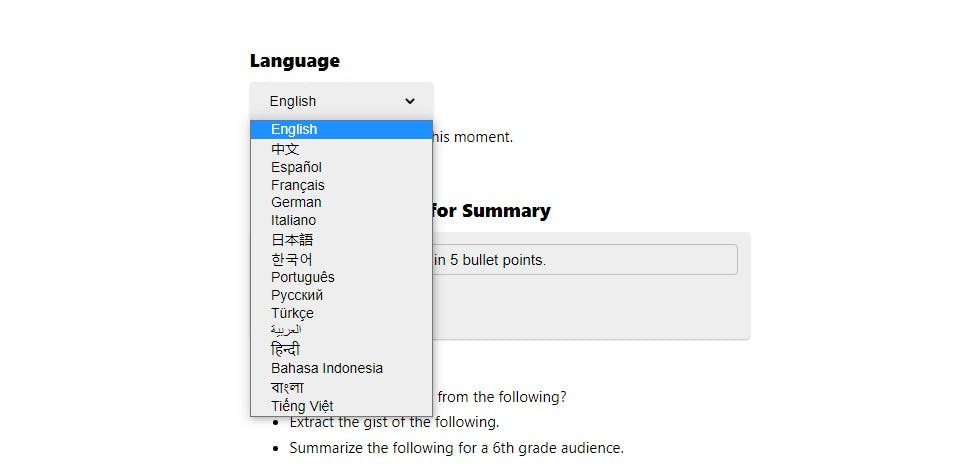
Figure 53. Select the desired language.
When you summarise a video; the prompts will be in your language.
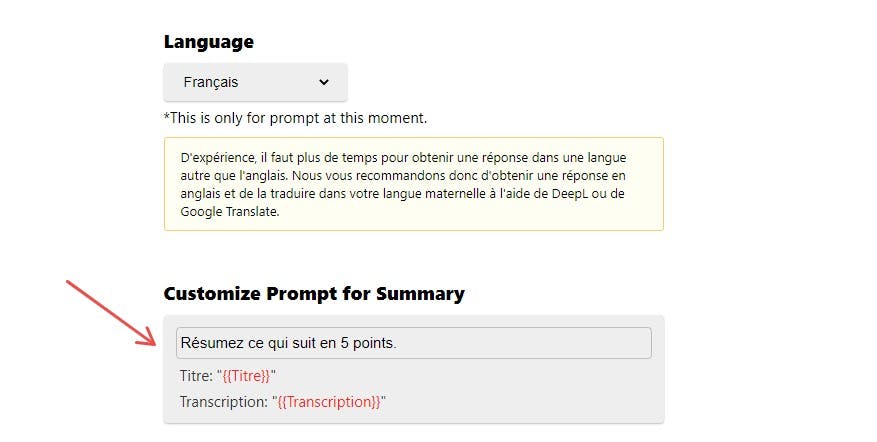
Figure 54. Customize the prompt in the desired language.
Tagging
In addition to adding highlights, you can also add tags to your highlights so other like-minded individuals interested in that topic can find them.
To add a tag to your highlight, follow the steps below:
On the Glasp extension tab, click on the Tag icon.
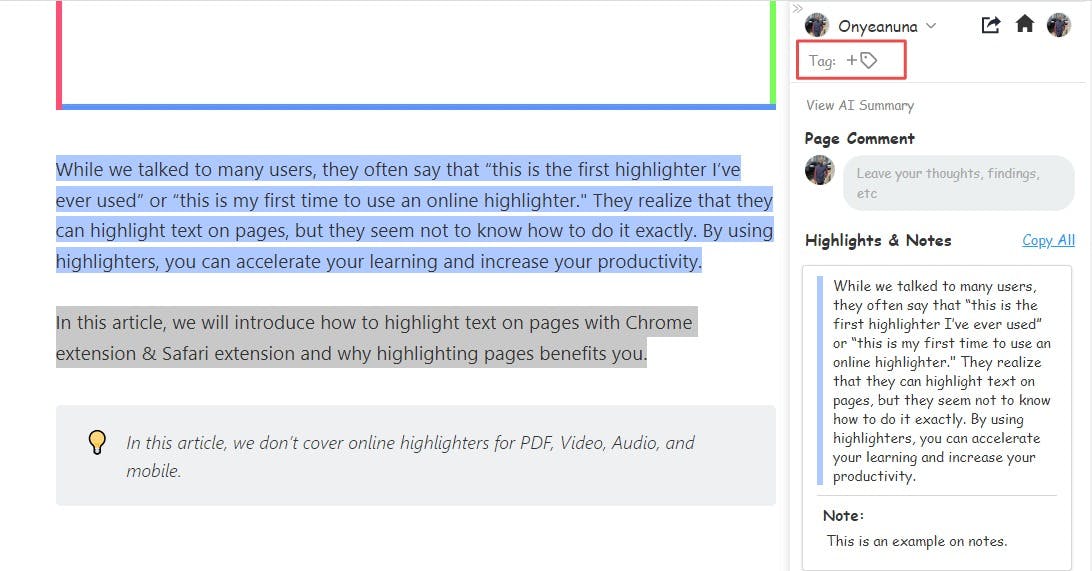
Figure 55. Glasp tags.
Add the tag.
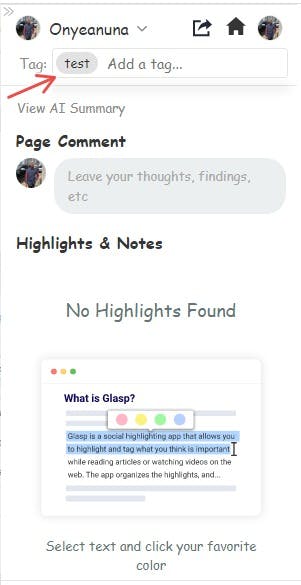
Figure 56. Add a tag to highlight.
You can add multiple tags to your highlights. You can also see these tags on your dashboard.
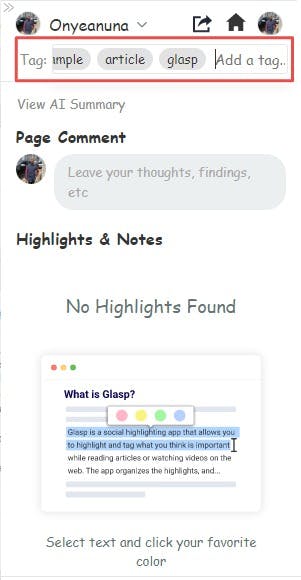
Figure 57. Adding multiple tags to highlight.
These features can make your study experience smooth and easy.
Glasp FAQ
Glasp is a powerful tool that can help you maximize your online reading and research. The following are some frequently asked questions about Glasp:
Q: How do I sign up for Glasp?
A: You can sign up for Glasp by visiting their website and creating an account.
Q: Is Glasp free to use?
A: Yes, Glasp is free to use.
Q: Can I see who has viewed my highlights?
A: No, Glasp does not currently offer a feature to see who has viewed your highlights. Howvever, you can see how many views your highlight has.
Q: Can I collaborate with others on Glasp?
Yes, you can collaborate with others on Glasp by following their highlights and sharing your own.
Q: Is Glasp available on mobile devices?
A: No, Glasp is only available as a web extension.
Q: Is there a limit to how many highlights I can make on Glasp?
A: No, there is no limit to the number of highlights you can make on Glasp.
Q: Can I delete my highlights on Glasp?
A: Yes, you can delete your highlights on Glasp at any time.
