

A multi-container application is comprised of multiple software components, with each running within a containerized environment. For example, you can have a multi-container application that consists of a web server, a database, and a cache server.
These containers can communicate with each other over predefined network channels or shared volumes, enabling them to work together to provide the overall functionality of the application.
In this tutorial, you'll learn how to deploy a multi-container application to Kubernetes. In the process, you'll create the manifest files required to define the application's components and deploy them to your cluster. By the end of the tutorial, you'll have your multi-container application running on a Kubernetes cluster.
Prerequisites
This tutorial will use a beginner-friendly approach to breaking down the steps involved in deploying a multi-container application. However, you should have a basic understanding of Docker and Kubernetes before proceeding with this tutorial.
You should also have the following installed and configured on your machine:
Docker. This tutorial will use Docker Desktop to build and run the application locally. You can download Docker Desktop from the official Docker website. For CLI users, you'll need to install the Docker engine.
Kubernetes. You can use a local Kubernetes cluster like Minikube or Kind. This tutorial will use the Kubernetes cluster made available in Docker Desktop. If you choose to use Minikube, you can follow the instructions on the official Minikube website.
kubectl. This comes pre-installed with Docker Desktop. If you're using Minikube, you can install kubectl by following the instructions on the official Kubernetes website.
Project setup
This project aims to show you how multiple components running in separate containers can work together to provide the overall functionality of an application.
The application that you'll deploy is a todo list application provided by Docker. The two components of this application are a Node.js web server and a MongoDB database.
You'll use Docker Compose to build and run the application locally. After you've built the application's images, you'll enable the Kubernetes feature in Docker Desktop and deploy the application to a Kubernetes cluster.
Application setup
To get started, clone the application repository:
git clone https://github.com/Aahil13/multi-container-app.git
After cloning the repository, navigate to the project directory:
cd multi-container-app
The project directory contains the following files:
app: This directory contains the application code and the Dockerfile for the todo list app.compose.yml: This is the Docker Compose file which defines the services that make up the application.manifests: This directory will contain the manifest files required to deploy the application to Kubernetes.
Step 1: Containerize the app using Docker Compose
The compose.yml file defines the services that make up the application. The services include the todo-app service, which is the Node.js web server, and the todo-database service, which is the MongoDB database.
services:
  todo-app:
    build:
      context: ./app
    depends_on:
      - todo-database
    environment:
      NODE_ENV: production
    ports:
      - 3000:3000
      - 35729:35729
    develop:
      watch:
        - path: ./app/package.json
          action: rebuild
        - path: ./app
          target: /usr/src/app
          action: sync

  todo-database:
    image: mongo:6
    #volumes:
    #  - database:/data/db
    ports:
      - 27017:27017

#volumes:
  #database:
The todo-app service builds the todo list application using the Dockerfile in the app directory. The service depends on the todo-database service, which uses the mongo:6 image. The todo-app service is exposed on port 3000, and the todo-database service is exposed on port 27017.
Once Docker Desktop is running, you can build and run the application. On your terminal, run the command below:
docker-compose up -d
On Docker Desktop, you should see the two services running:
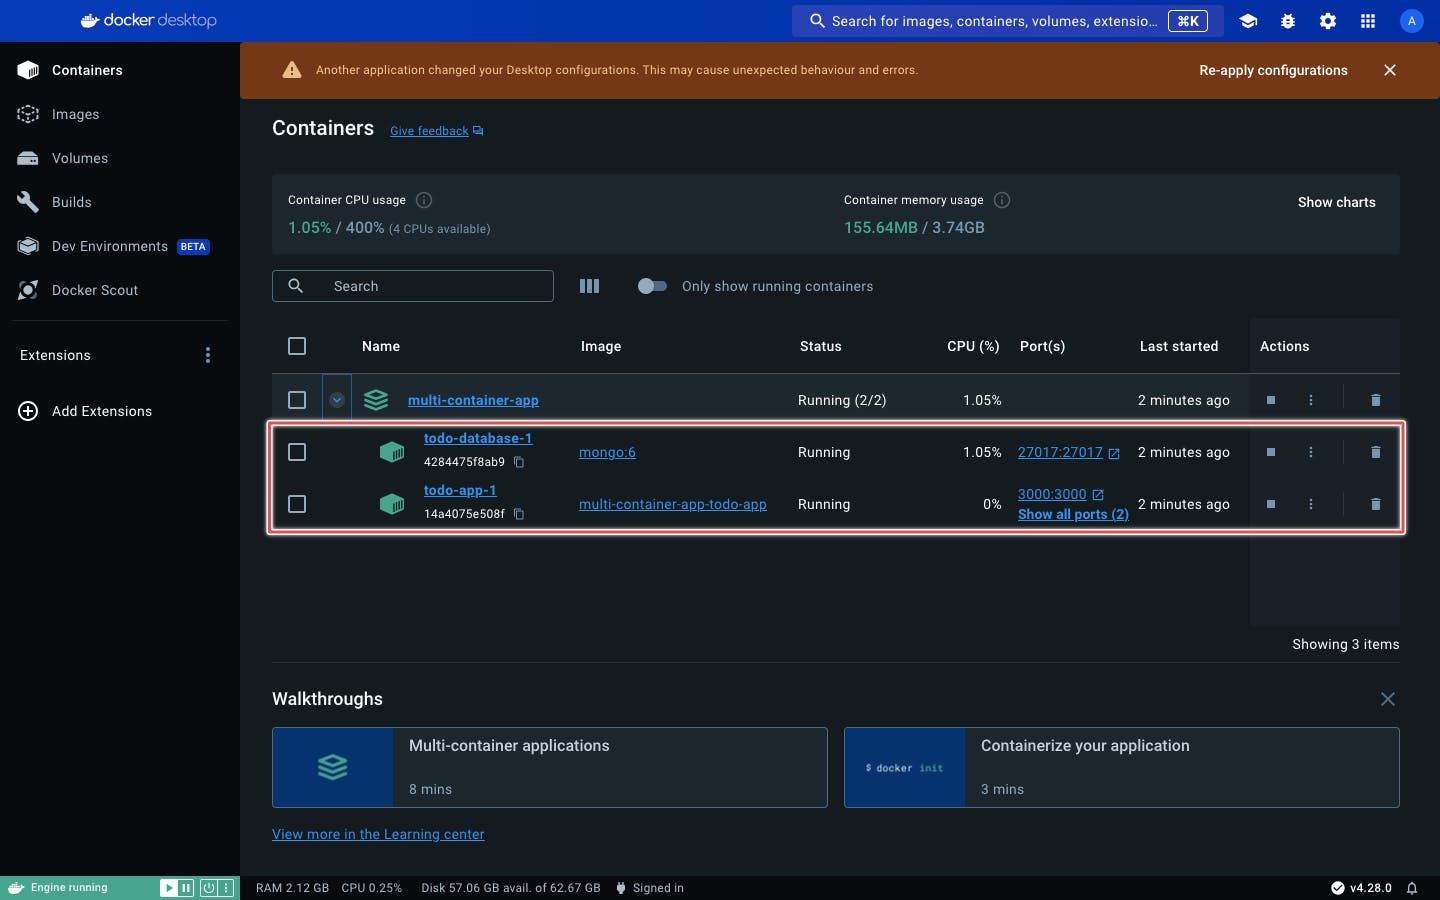
Figure 1: Containers running on Docker Desktop
To access the application on your browser, visit localhost:3000. You should see the todo app running:
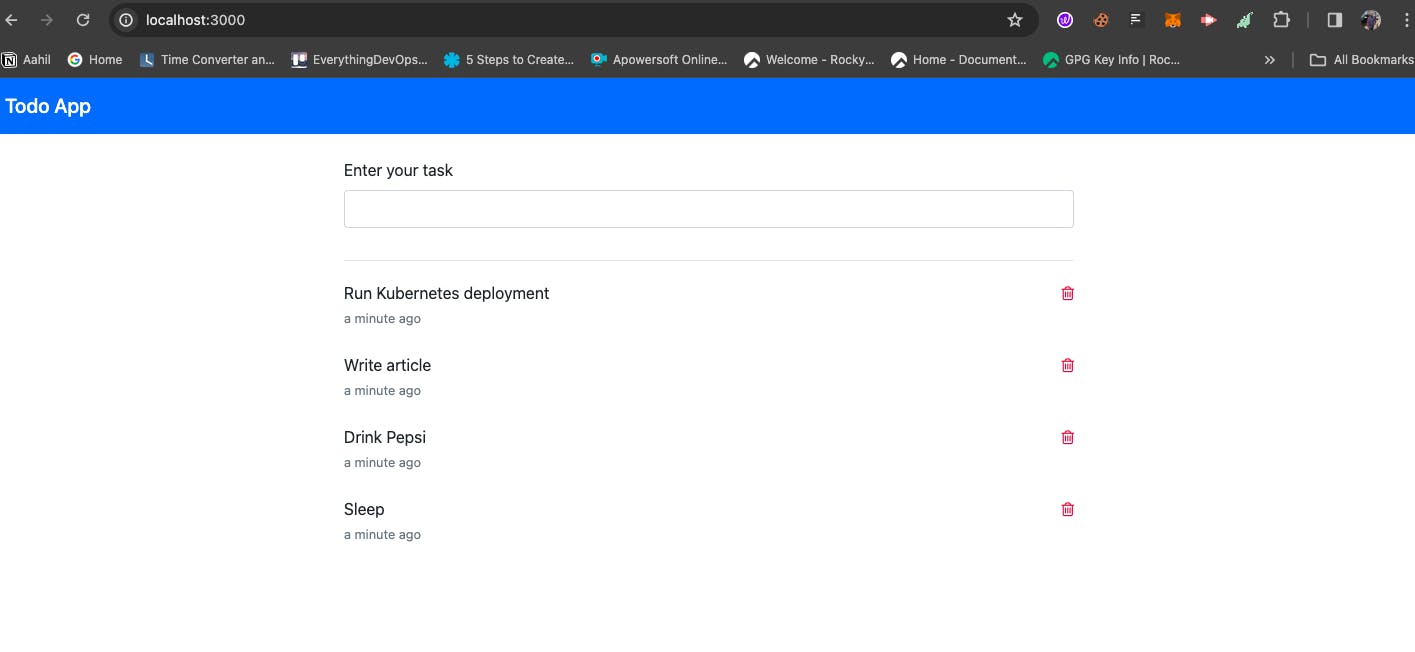
Figure 2: Todo app running in the browser
Step 2: Enable Kubernetes on Docker Desktop
Docker Desktop comes with a Kubernetes feature. This feature allows you to run Kubernetes locally on your machine. It gives you a single-node Kubernetes cluster.
To enable the feature, follow the steps below:
On Docker desktop, navigate to Settings > Kubernetes.
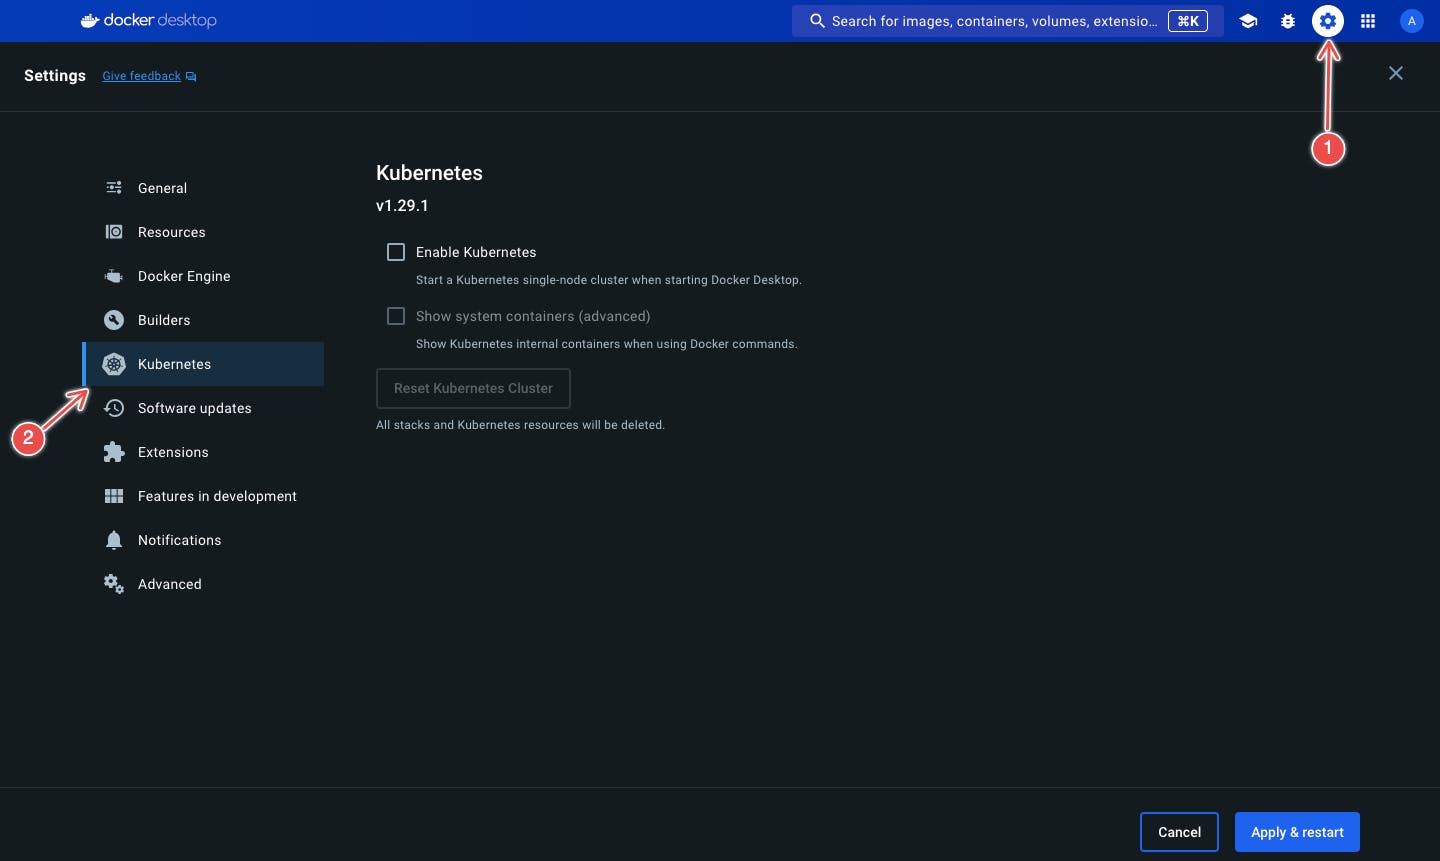
Figure 3: Docker Desktop settings
Click on the Enable Kubernetes checkbox.
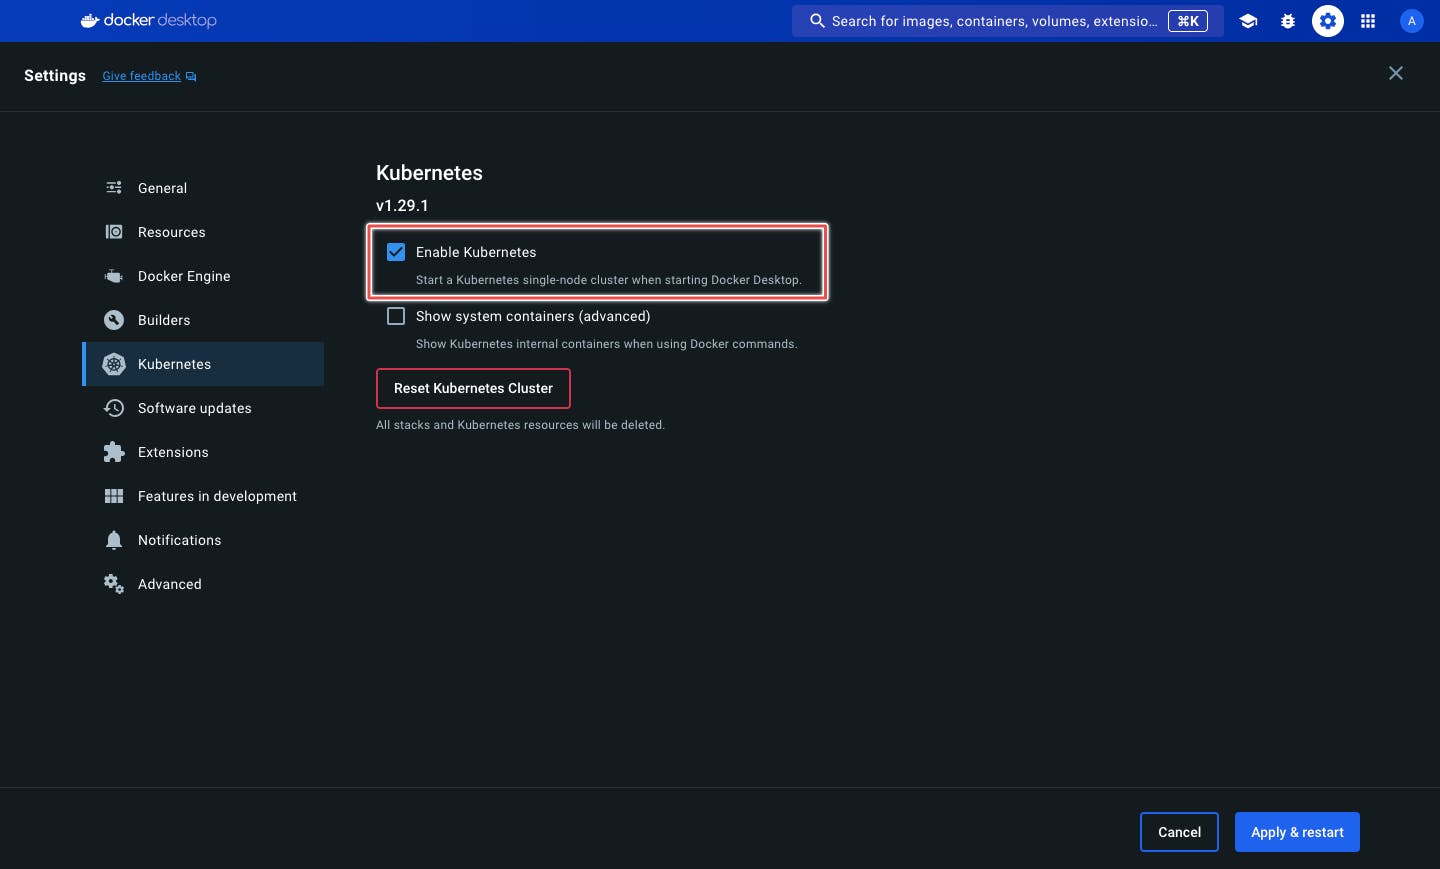
Figure 4: Enable Kubernetes
Click on the Apply & Restart button.
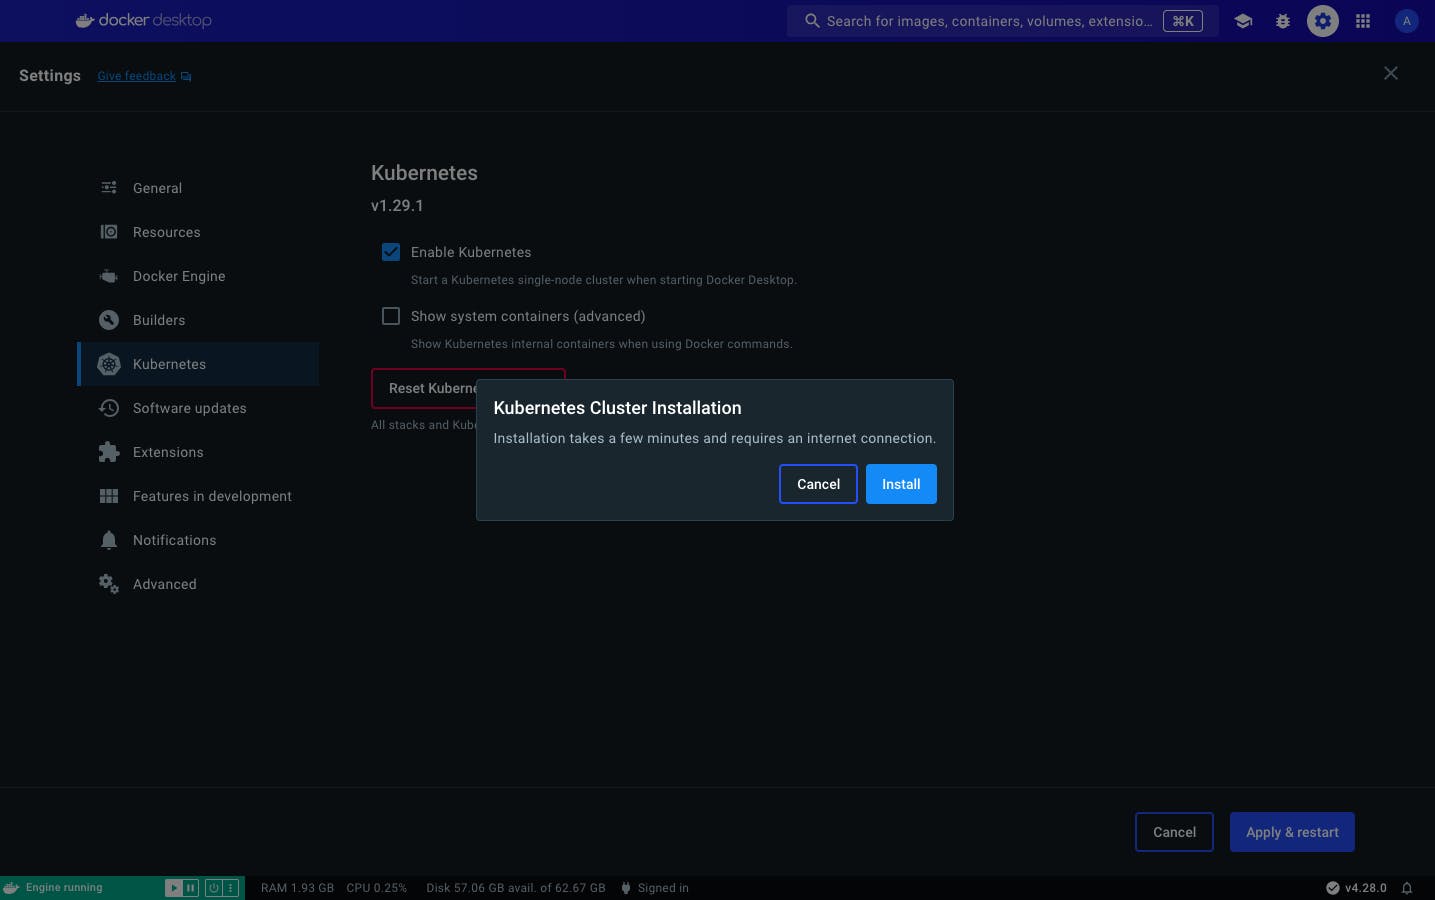
Figure 5: Apply & Restart
After enabling Kubernetes, navigate to the images tab on Docker Desktop. You should see newly added images all relating to a Kubernetes cluster.
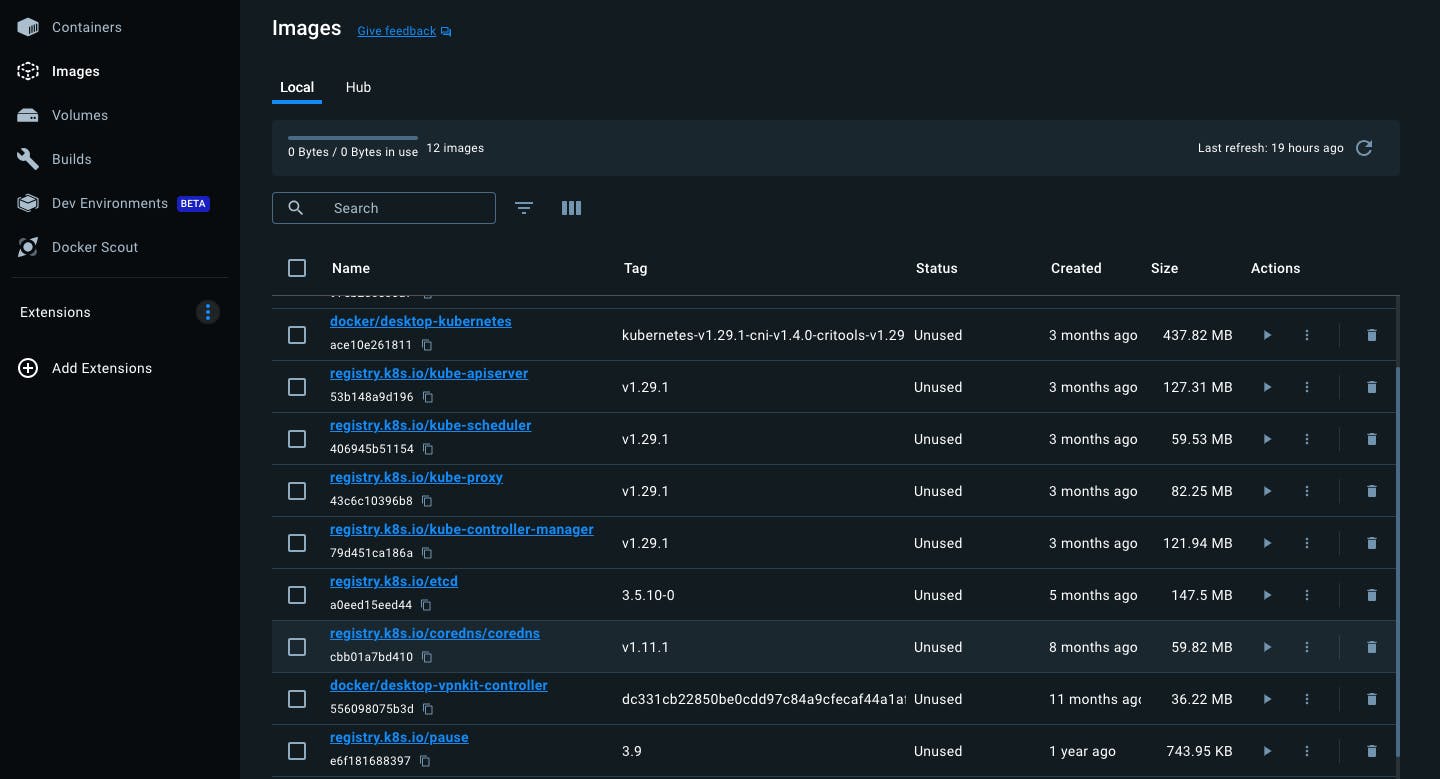
Figure 6: Kubernetes components
Step 3: Create & apply Kubernetes manifest files
The manifests needed for this application are a Deployment and a Service. The Deployment will define the application's components, and the Service will expose the application to the outside world.
The todo app and the MongoDB database will each have their Deployment and Service.
Todo app manifest
In the manifests directory, you'll find the todo-app.yaml file. This file defines the Deployment and Service for the todo app.
apiVersion: apps/v1
kind: Deployment
metadata:
  name: todo-app
spec:
  replicas: 2
  selector:
    matchLabels:
      app: todo-app
  template:
    metadata:
      labels:
        app: todo-app
    spec:
      containers:
      - name: todo-app
        image: multi-container-app-todo-app:latest
        imagePullPolicy: Never
        ports:
        - containerPort: 3000
        - containerPort: 35729
        env:
        - name: NODE_ENV
          value: production
---
apiVersion: v1
kind: Service
metadata:
  name: todo-app
spec:
  selector:
    app: todo-app
  ports:
    - name: http
      protocol: TCP
      port: 3000
      targetPort: 3000
    - name: live-reload
      protocol: TCP
      port: 35729
      targetPort: 35729
  type: NodePort
This file defines a Deployment with two replicas for the todo app. The Service exposes the todo app on ports 3000 and 35729.
The image for the todo app is multi-container-app-todo-app:latest. This is the same image that was built when you ran docker-compose up -d.
The imagePullPolicy is set to Never to prevent Kubernetes from pulling the image from a registry. This is because the image is built locally.
MongoDB manifest
The todo-database.yaml file defines the Deployment and Service for the MongoDB database.
apiVersion: apps/v1
kind: Deployment
metadata:
  name: todo-database
spec:
  replicas: 1
  selector:
    matchLabels:
      app: todo-database
  template:
    metadata:
      labels:
        app: todo-database
    spec:
      containers:
      - name: todo-database
        image: mongo:6
        ports:
        - containerPort: 27017
---
apiVersion: v1
kind: Service
metadata:
  name: todo-database
spec:
  selector:
    app: todo-database
  ports:
    - name: mongodb
      protocol: TCP
      port: 27017
      targetPort: 27017
  type: NodePort
This file defines a Deployment with one replica for the MongoDB database. The Service exposes the MongoDB database on port 27017.
This deployment uses the mongo:6 image from the Docker registry.
To apply the manifest files, run the following commands:
kubectl apply -f manifests/todo-app.yaml
kubectl apply -f manifests/todo-database.yaml
After applying the manifest files, you can check the status of the deployments and services by running the following commands:
kubectl get deployments
kubectl get services
You should see the todo app and the MongoDB database running:

Figure 7: Kubernetes components
Step 4: Access application
To access the application, you'll need to get the NodePort of the todo app service. Run the following command:
kubectl get svc todo-app
You should get a similar output:
NAME       TYPE       CLUSTER-IP      EXTERNAL-IP   PORT(S)                          AGE
todo-app   NodePort   10.110.153.38   <none>        3000:32670/TCP,35729:32639/TCP   9m37s
The NodePort for the todo app service is 32670. To access the application, visit localhost:32670 on your browser.
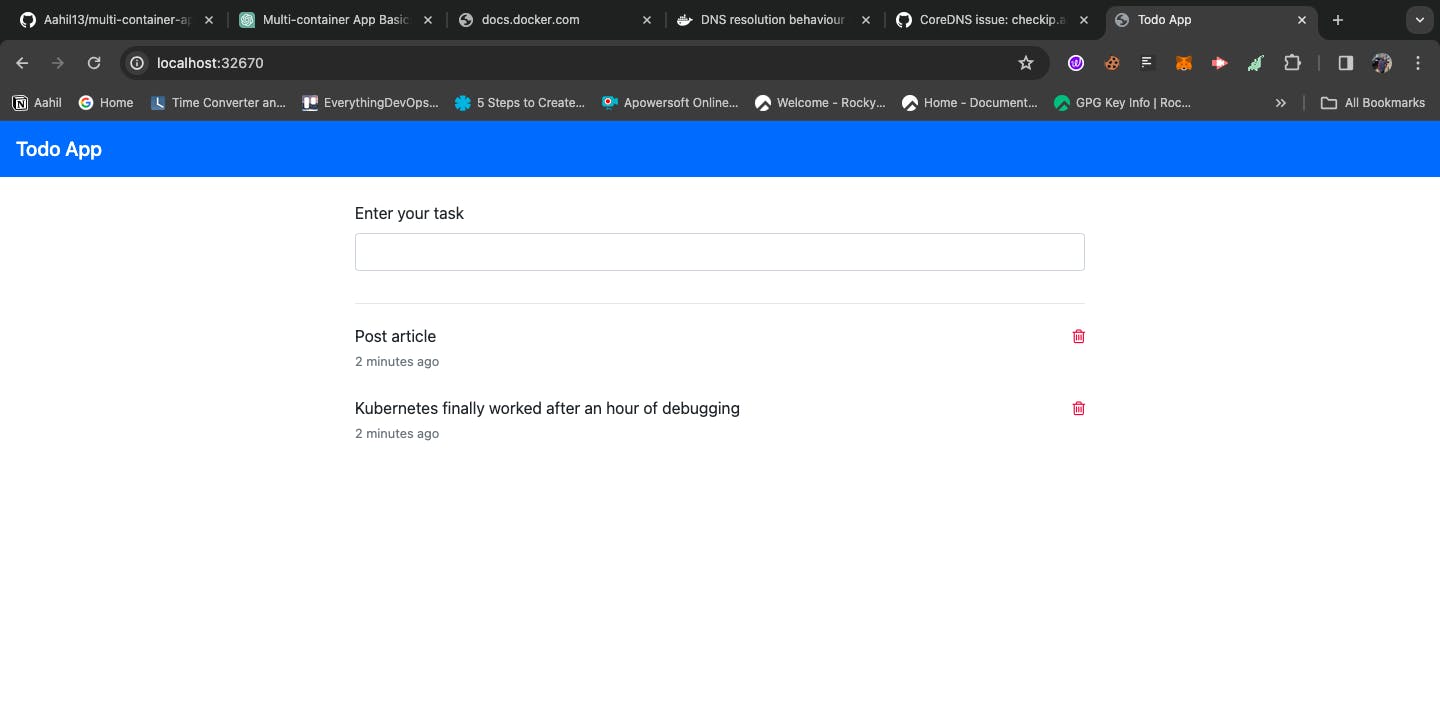
Figure 8: Todo app running in the browser
Common errors
One error you might encounter is the ImagePullBackOff error. This error occurs when Kubernetes is unable to pull the image from a registry. Since the todo app image is built locally, you'll run into this error.
The error looks like this:
NAME                        READY   STATUS             RESTARTS   AGE
todo-app-7b8f8b8b8-2q8zq    0/1     ImagePullBackOff   0          2m
To resolve this error, ensure that the image is built locally and that imagePullPolicy is set to Never in the manifest file. After setting this, delete the pod and let Kubernetes recreate it.
Conclusion
At this point, you should be playing around with your todo application. You containerized it, enabled Kubernetes on Docker Desktop, and deployed it to the Kubernetes cluster.
This is a local deployment and you've tested that the application is running as expected. The next step would be to deploy the application to a production environment using a managed Kubernetes service like EKS.