How to Setup a CI/CD Pipeline with Jenkins

Prince is a technical writer and DevOps engineer who believes in the power of showing up. He is passionate about helping others learn and grow through writing and coding.
A Continuous Integration/Continuous Deployment or Delivery (CI/CD) pipeline is a step-by-step process that automates the deployment of software. A pipeline code contains a series of steps (stages) that are executed in a sequence with each step building on the previous one. This method of software development is designed to reduce human error and increase the speed of deployment.
A CI/CD pipeline is a must-have for DevOps teams because it automates tasks, speeds up the release of new features, catches problems early, and keeps code reliable and consistent. Several tools can be used to set up a CI/CD pipeline, however, Jenkins has been around for a long time and has built a level of trust in the DevOps community.
The goal of this article is to guide you to a foundational understanding of what Jenkins is by giving brief explanations of some of its key concepts such as controllers, agents and executors. You'll also put this knowledge into practice by installing and configuring Jenkins on your local machine. At the end of this article, you'll have set up a test pipeline on Jenkins thereby gaining a first-hand understanding of the Jenkins interface.
Prerequisites
This article aims at beginners who are new to Jenkins, so new concepts will be broken down thoroughly.
However, it is assumed that you have a basic understanding of software development and are familiar with the concept of CI/CD. You should also have Git installed on your local machine.
What is Jenkins?
Jenkins is an open-source, self-contained automation server widely used by developers to automate the process of building, testing, and deploying software. As an automation server, it provides developers a platform to define and configure pipelines to streamline these processes, as well as being self-contained, so all necessary components are included within its environment.
Jenkins is written in Java and is extensible through plugins. These plugins allow Jenkins to integrate with a wide variety of tools and technologies making it a very adaptable tool for changing IT environments and infrastructure.
Being one of the oldest and most widely adopted automation servers, Jenkins has concise documentation and a broad knowledge base. This robust support infrastructure significantly makes the processes of installing, integrating, and managing Jenkins easy for its users.
Common Pipeline Concepts
Before we dive into the installation and configuration of Jenkins, let's take a look at some of the key concepts that are essential to understanding Jenkins. A good understanding of these concepts will give you a clearer picture of how the Jenkins infrastructure works.
Controller: Think of the controller as Jenkins' brain—it's the primary installation on your computer. The controller manages tasks related to your build system, like running pipeline scripts. When you write pipeline scripts (instructions for Jenkins), the controller reads and understands them.
Agent (formerly known as "slave"): An agent acts as a helper to the controller, operating on another computer to assist with specific projects. By setting up agents, you can offload tasks from the controller and allocate them to dedicated machines. Depending on your setup, you can decide how many agents you need and what tasks they can help with.
Executor: Executors are the hands-on workers of Jenkins, executing tasks such as compiling code or running tests. Executors can run on either the controller or agent machines, and they can work on tasks independently or collaboratively. Jenkins assigns a specific task to each executor to complete.
Simply put, the controller is the main Jenkins setup that manages tasks, agents are additional helpers to share the workload, and executors are the actual workers doing the tasks assigned by Jenkins.
Installing Jenkins
By now, you should have a rough idea of what Jenkins is and how it works. To paint a clearer picture, you'll interact with Jenkins by installing it on your local machine.
This tutorial will guide you through the installation of Jenkins on an Ubuntu AWS instance. If you're using a different operating system, you can find the installation instructions for your OS on the Jenkins website.
Step 1: Install Java
Jenkins is a Java-based application, so you need to have the Java Runtime Environment (JRE) version 8 or later installed on your machine.
Run the command below to install Java:
sudo apt update
sudo apt install openjdk-11-jre-headless
Step 2: Install Jenkins
There are two ways to install Jenkins on Ubuntu; using the official Jenkins repository or by downloading the Jenkins WAR file. This tutorial will guide you using the latter.
Run the commands below to download the Jenkins WAR file:
wget https://get.jenkins.io/war-stable/2.426.1/jenkins.war

Figure 1: Jenkins WAR file installation
Step 3: Start Jenkins
Starting the Jenkins server will require access to port 8080. If you're running Jenkins on an AWS instance, you'll need to open port 8080 in your security group.
Run the command below to start Jenkins:
java -jar jenkins.war --httpPort=8080
Step 4: Access Jenkins
Once Jenkins is running, you can access it by opening your browser and navigating to http://<your-server-ip>:8080.
You should have the following page displayed in your browser:

Figure 2: Unlock Jenkins page
The first time you access Jenkins, you'll be prompted to enter the initial admin password. You can find the password in the /var/lib/jenkins/secrets/initialAdminPassword file on your server.
However, since we're running Jenkins in the foreground, you can find the initial admin password in the terminal where Jenkins is running.

Figure 3: Jenkins initial admin password
Copy the password and paste it into the Administrator password field, then click Continue.
Running Jenkins in the foreground restricts you from using the terminal for other tasks. To run Jenkins in the background, create a file called launch.sh and add the Jenkins start command to it.
After which, run the command below to make the file executable:
sh launch.sh &
Step 5: Install Plugins
After entering the initial admin password, you'll be prompted to install plugins. You can either install the suggested plugins or select the plugins you want to install. It's best to install the suggested plugins as they contain the most commonly used plugins.
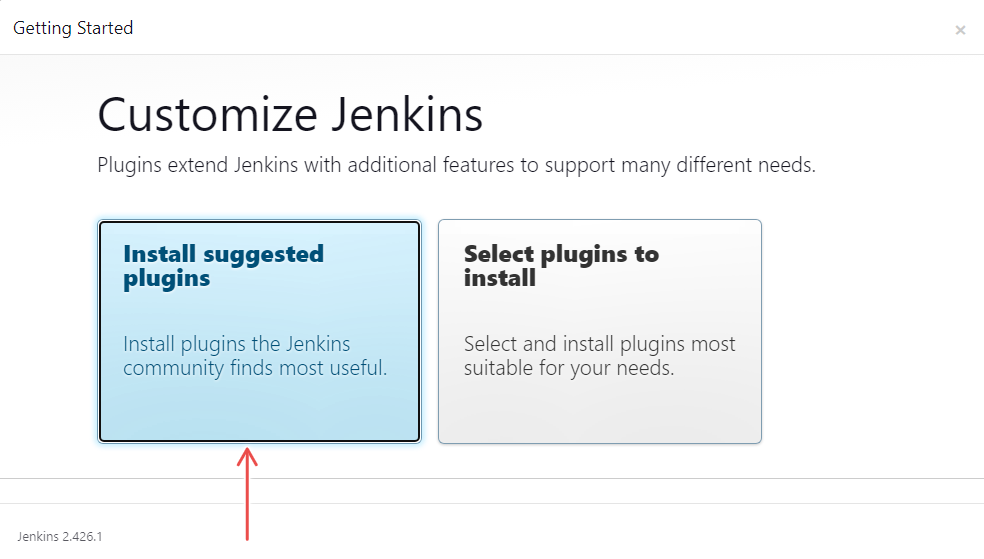
Figure 4: Jenkins plugins installation
Step 6: Create an Admin User
An Admin user is required to manage Jenkins. You'll be prompted to create an admin user after installing the plugins.
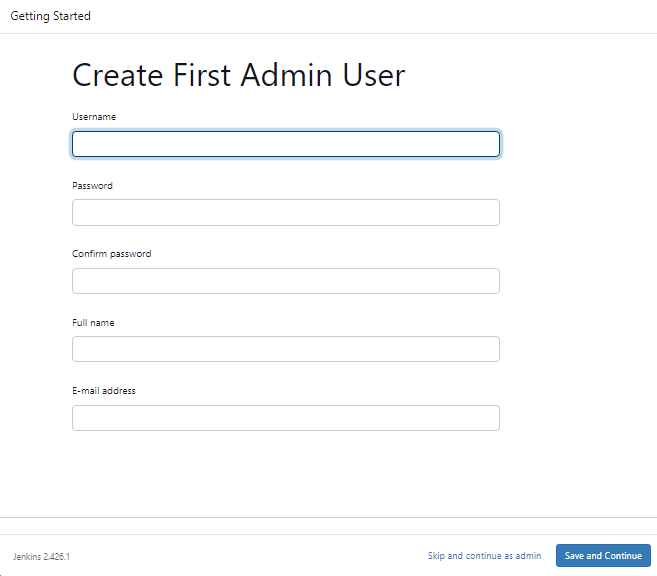
Figure 5: Jenkins admin user creation
Fill in the required fields and click Save and Continue.
Step 7: Jenkins URL
The next page will prompt you to set the Jenkins URL. The URL will be automatically generated, so you can click Save and Finish to proceed.
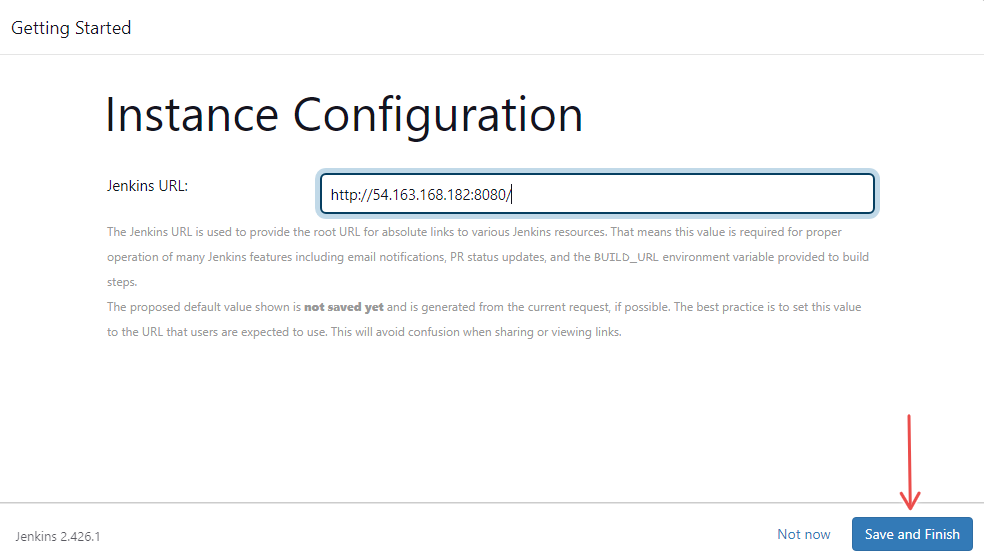
Figure 6: Jenkins URL configuration
Step 8: Jenkins Setup Complete
You should see a Jenkins is ready! page. Click Start using Jenkins to access the Jenkins dashboard.
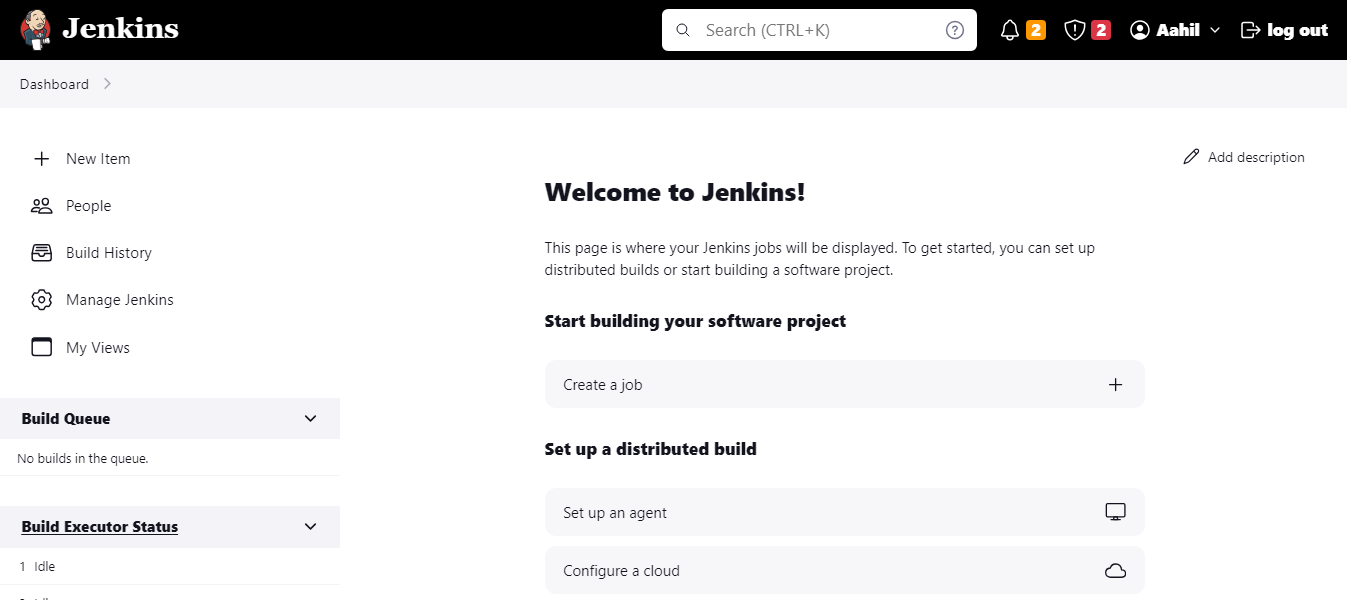
Figure 7: Jenkins dashboard
Configuring Jenkins
The Jenkins dashboard is the first page you see when you log in to Jenkins. It provides an overview of the current state of Jenkins and allows you to access its different features.
To configure Jenkins, click on Manage Jenkins in the left-hand menu. This will take you to the Jenkins management page where you can configure Jenkins settings, manage plugins, and more.
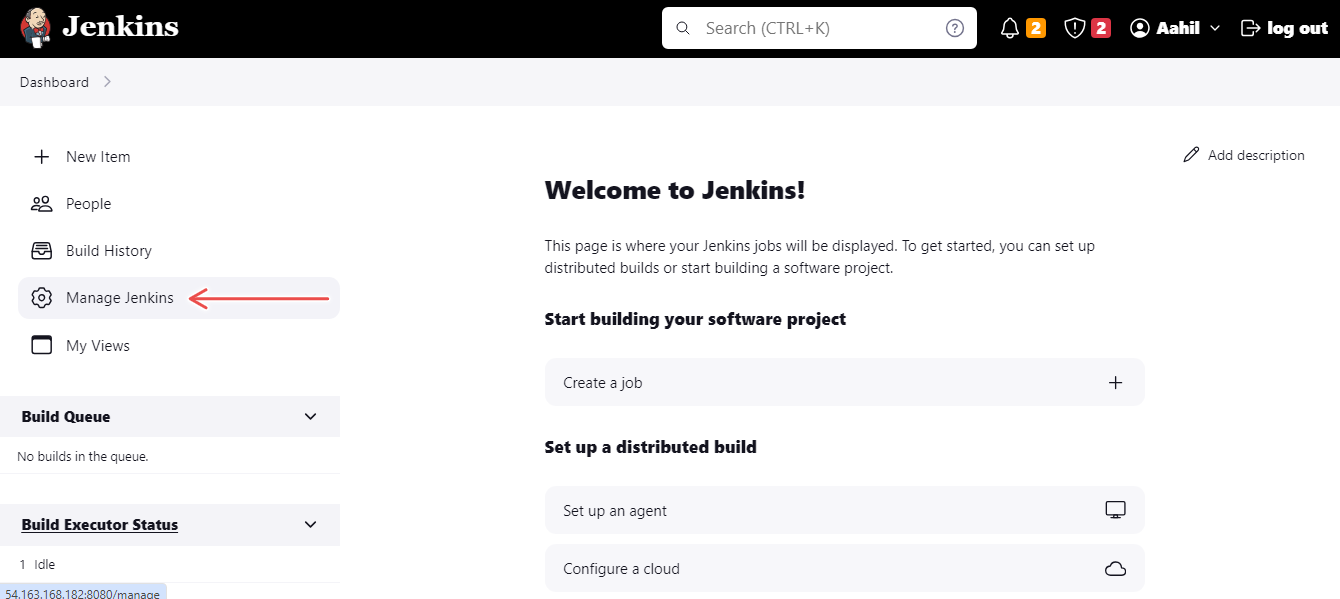
Figure 8: Manage Jenkins
Here are three important configurations you should make:
JDK Installation: Jenkins requires a JDK to run. Configure the JDK by following the steps below:
In the Manage Jenkins page, click on Tools.
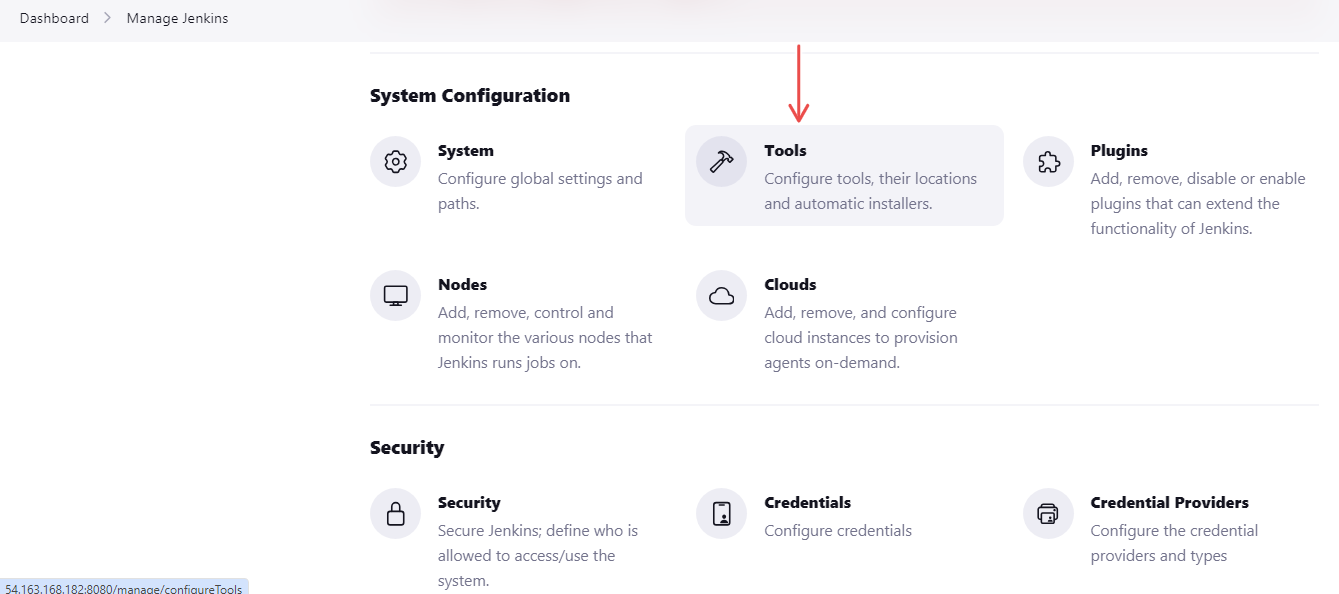
Figure 9: Jenksin Tools configuration
Scroll down to the JDK section and click Add JDK.
To get the path to your JDK installation, navigate to your terminal and run the command below:
find / -type f -name javaThe path should look something like this:
/usr/lib/jvm/java-11-openjdk-amd64/bin/javaCopy the path to your JDK installation and paste it into the JAVA_HOME field.
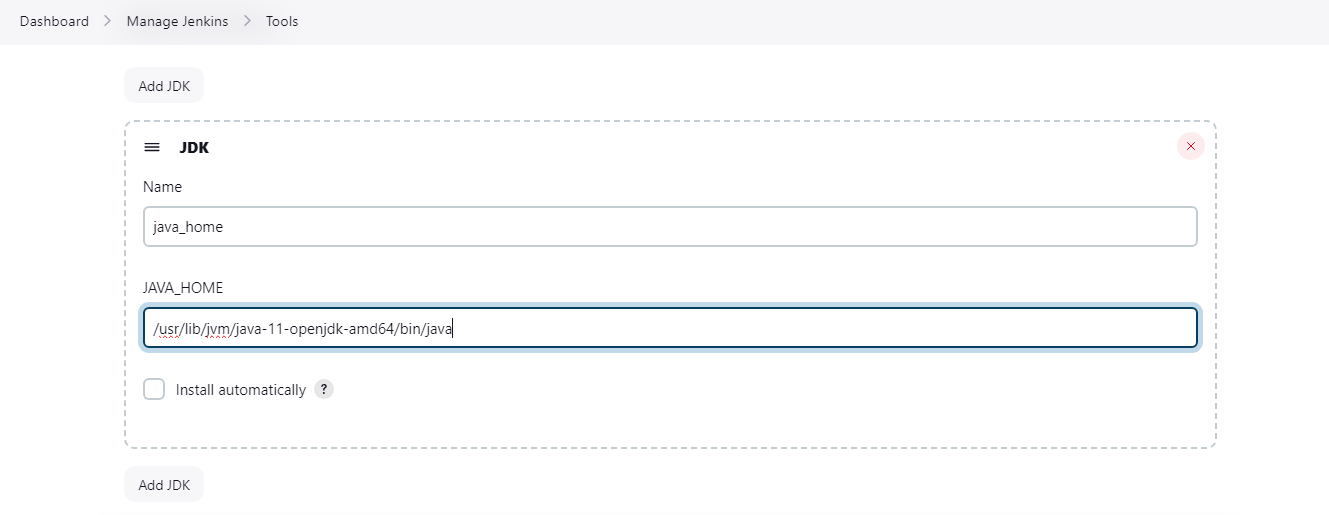
Figure 10: JDK configuration
Git Installation: Most projects use Git for version control. Tick the Install automatically checkbox to install Git automatically.
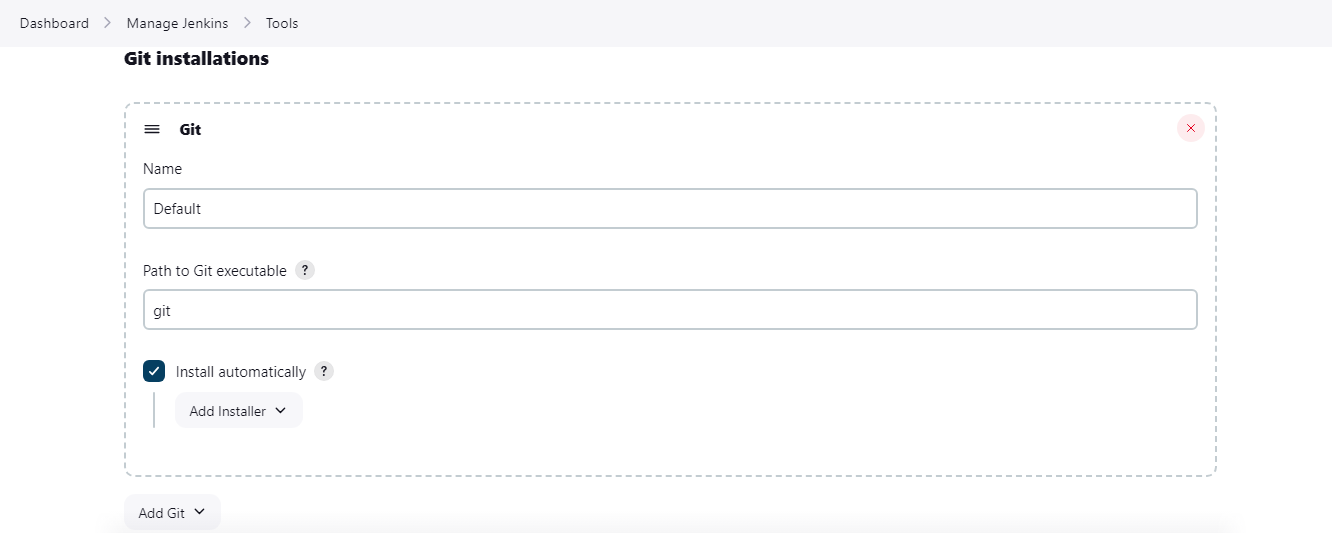
Figure 11: Git configuration
Maven Installation: Apache Maven is a software project management and comprehension tool. It is used to manage the build process of a project. To install Maven, follow the steps below:
Enter a name for your Maven installation and select automatic installation.
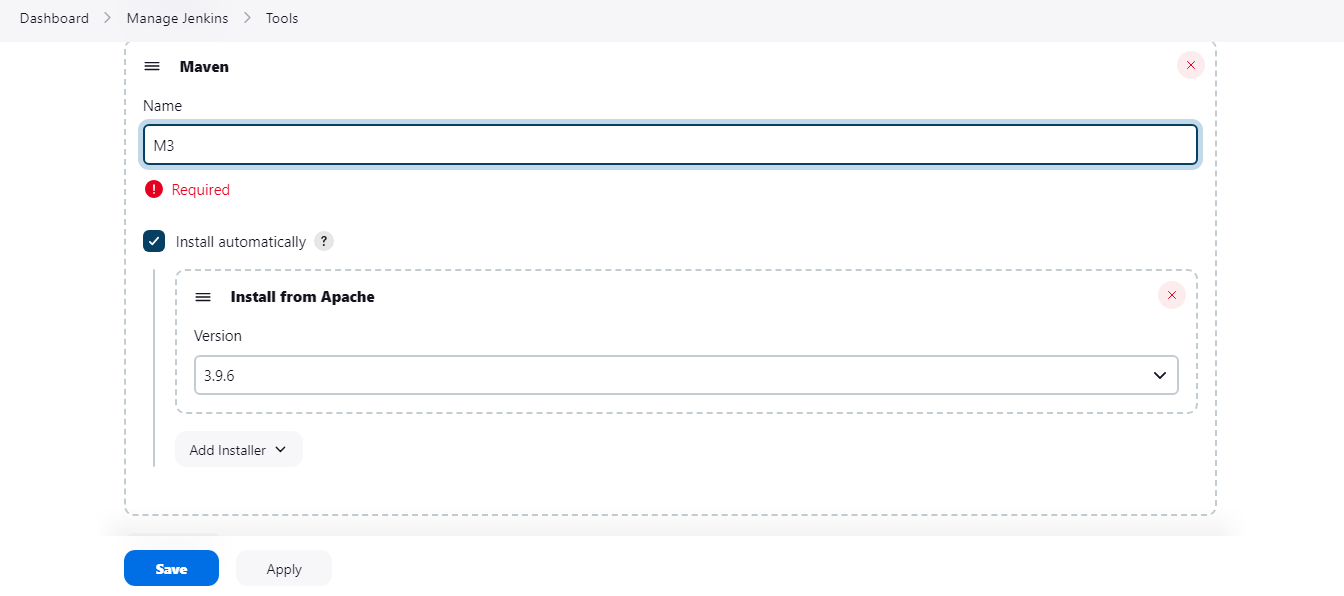
Figure 12: Maven configuration
After configuring Jenkins, click Save to apply these changes.
Creating a Jenkins Freestyle Project
A Jenkins Freestyle project is the traditional way of setting up tasks in Jenkins. It's called freestyle because it offers flexibility in configuring different build steps and actions without adhering to a strict structure. Freestyle projects are suitable for simple tasks where you don't need a complex workflow.
To create a Jenkins Freestyle project, follow the steps below:
Click on New Item in the Jenkins dashboard.
Enter a name for your project and select Freestyle project, then click OK.
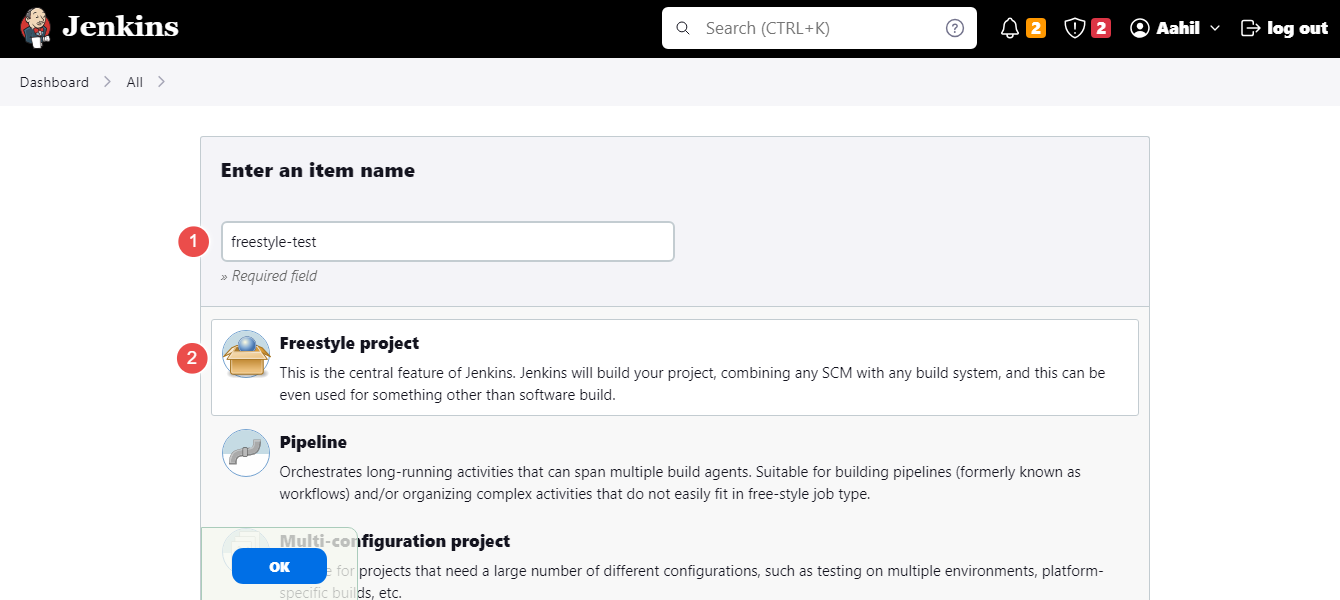
Figure 13: Freestyle project
In the project configuration page, you can configure several sections such as the project's description, Source Code Management, Build Triggers, etc.
For this tutorial, you'll configure the Source code management section. Select Git and enter the URL of your Git repository.
https://github.com/Aahil13/The-Cloud-Resume-Challenge.git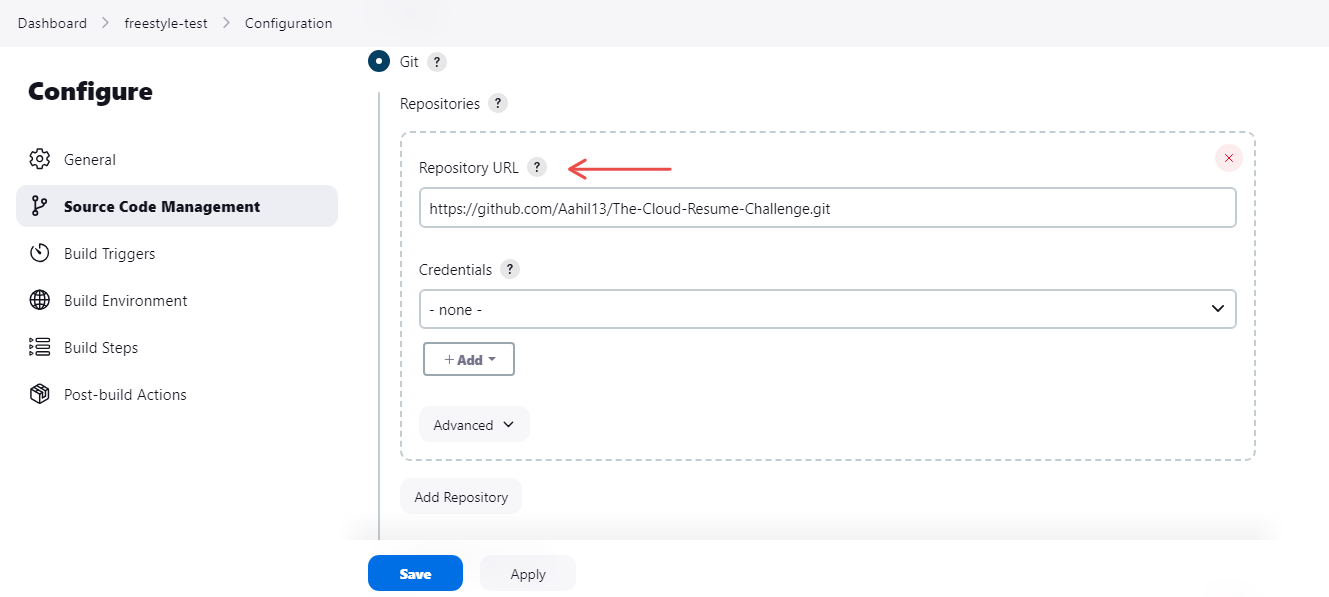
Figure 14: Freestyle project configuration 1
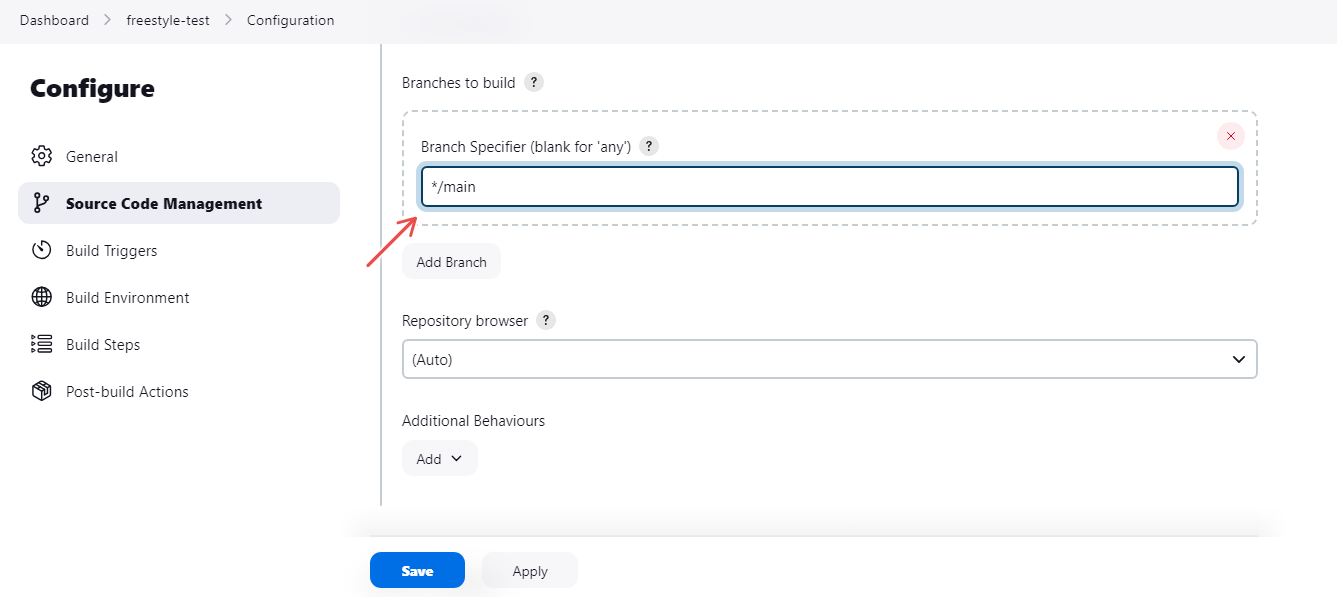
Figure 15: Freestyle project configuration 2
Click Save to save your project configuration.
Click Build Now to run your project.
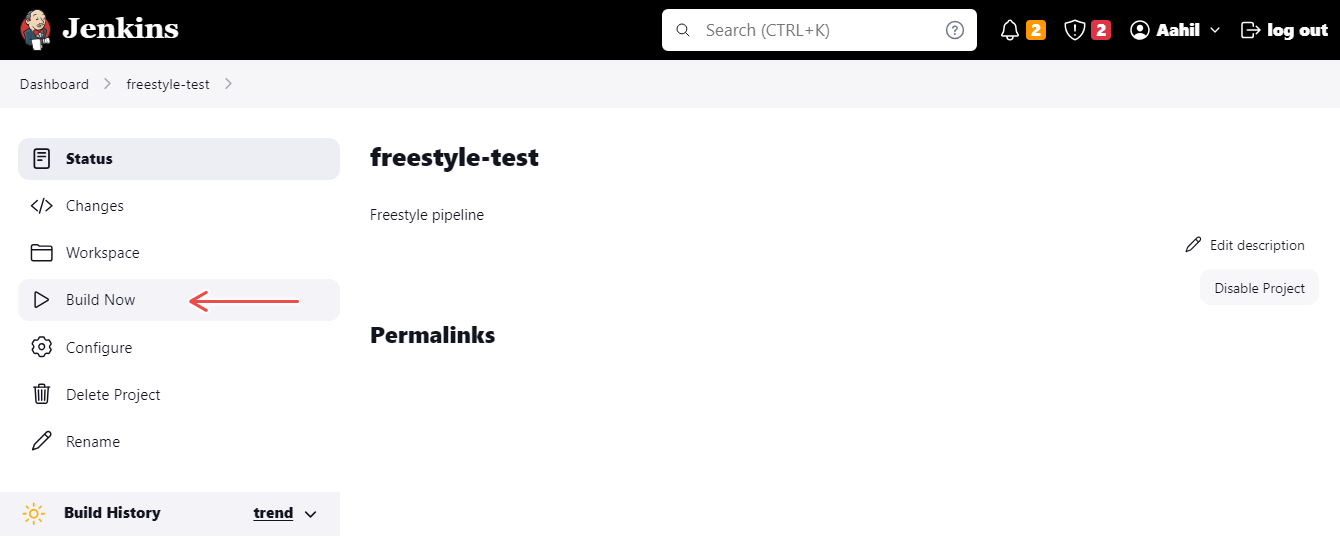
Figure 16: Freestyle Build Now
Click on the build number to view the build output.

Figure 17: Jenkins Build number
Click on the Console Output to view the build log.
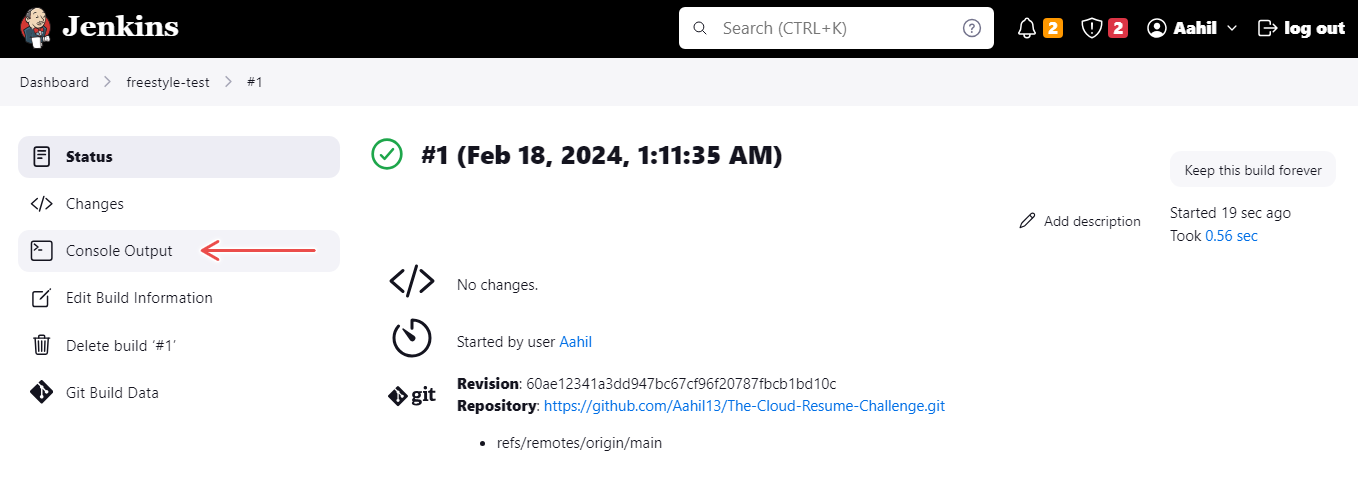
Figure 18: Jenkins Console Output 1
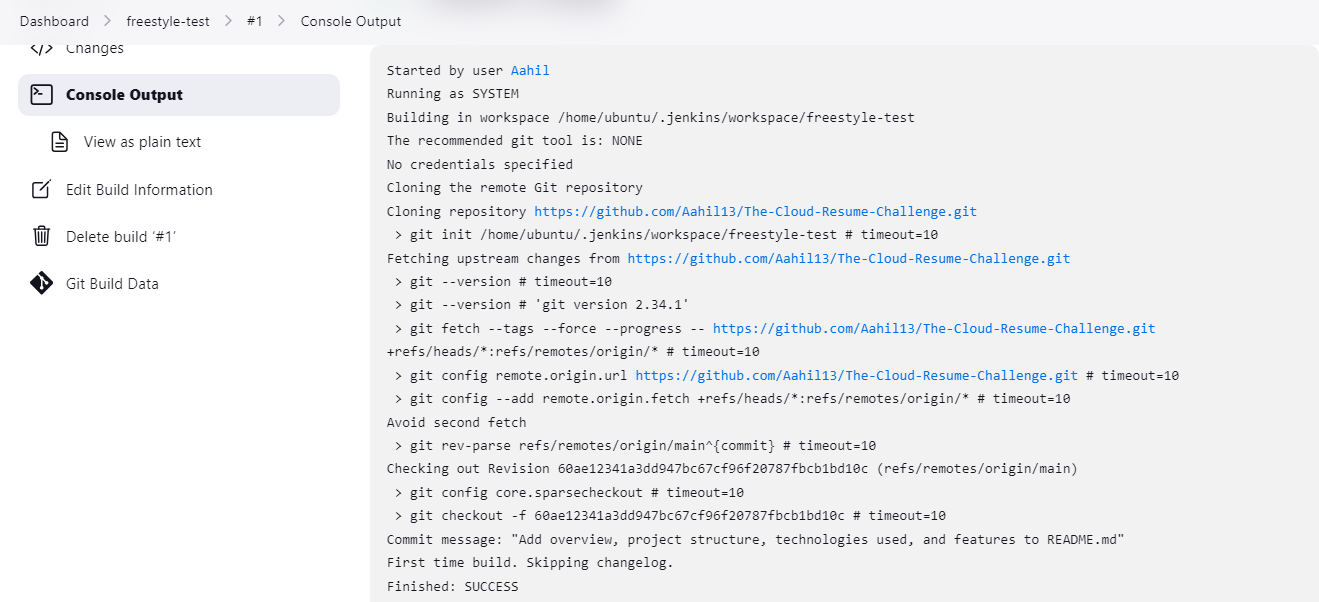
Figure 19: Jenkins Console Output 2
This Freestyle project will pull the code from the specified Git repository and run the build. To see the repository's code, you can navigate to the Workspace directory in the Jenkins server.
cd .jenkins/workspace/<freestyle-project-name>

Figure 20: Jenkins Workspace
Creating a Jenkins Pipeline Project
A Pipeline in Jenkins is a more modern and structured approach to defining your build process. It's based on writing code in a Jenkinsfile, which is a script that defines the entire build process as code.
Pipelines offer more flexibility and power because you can version control your build process, reuse code, and have a clearer view of your entire build process in one place. With pipelines, you can define complex workflows, handle errors more gracefully, and scale your build processes more effectively.
To create a Jenkins Pipeline project, follow the steps below:
Click on New Item in the Jenkins dashboard.
Enter a name for your project and select Pipeline, then click OK.
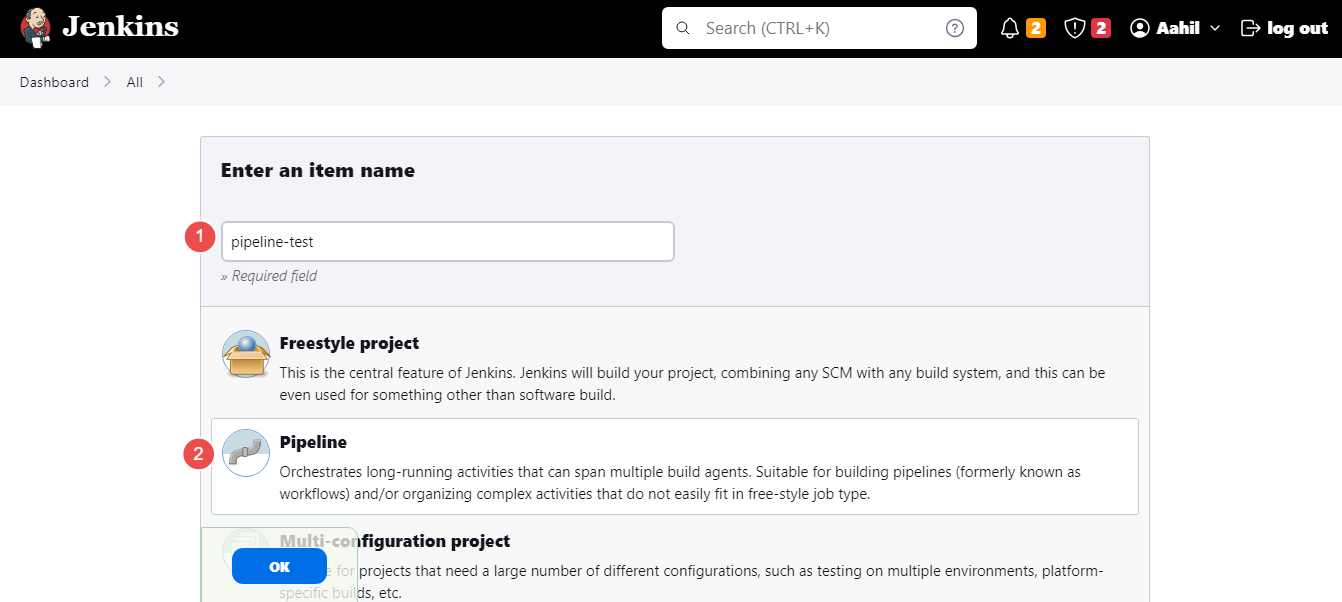
Figure 21: Pipeline project
In the project configuration page, you can configure several sections such as the project's description, Build Triggers, Pipeline script, etc.
For this tutorial, you'll configure the Pipeline section. There are two ways to define your pipeline script: Pipeline script definition and Pipeline script from SCM.
The former allows you to write your pipeline script directly in the Jenkins interface, while the latter allows you to pull your pipeline script from a source code management system.
For this tutorial, you'll select Pipeline script and write your pipeline script directly in the Jenkins interface.
Jenkins provides a simple pipeline script that you can use to test your pipeline. Click on the dropdown and select Scripted Pipeline.
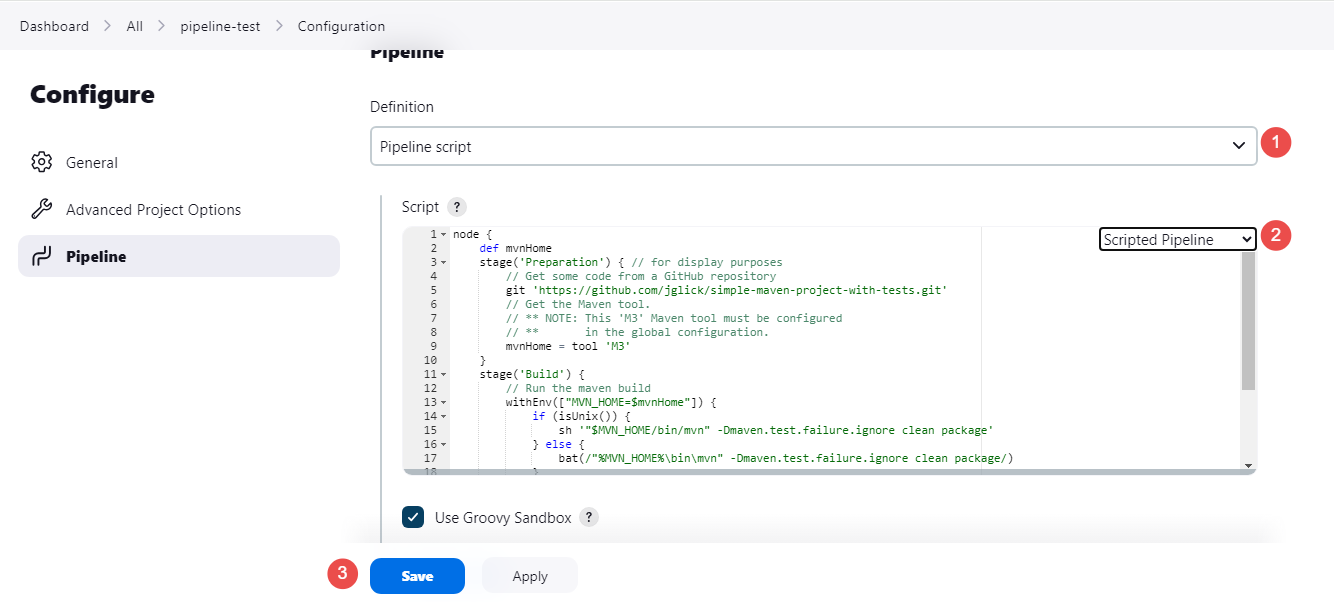
Figure 22: Pipeline project configuration
Click Save to save your project configuration.
Click Build Now to run your project.

Figure 23: Pipeline Build Now
Click on the build number to view the stages of your pipeline.
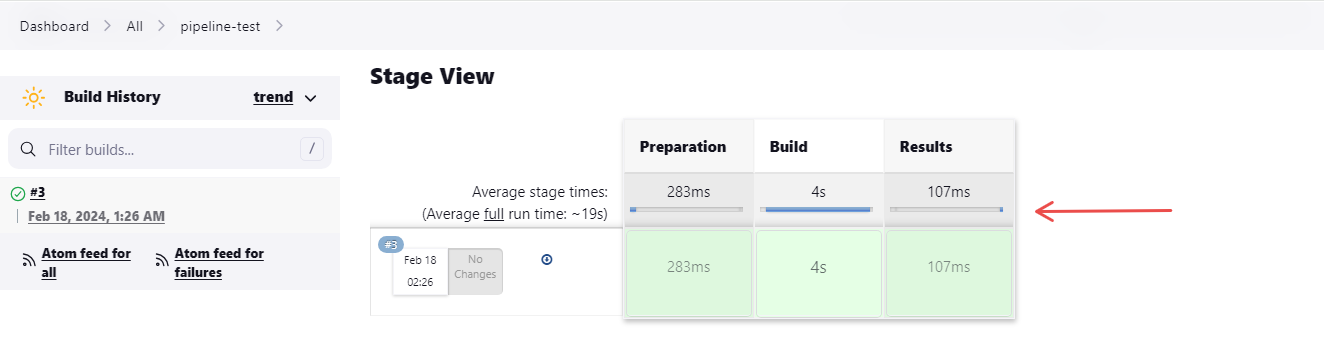
Figure 24: Jenkins Pipeline stages
This Pipeline script checks out a Maven project from a Git repository, builds the project, and runs the tests.
Conclusion
At this point, you've gotten your hands dirty with Jenkins. You got a foundational understanding of what Jenkins is, installed it on your local machine, and set up a freestyle project and a pipeline project.
This article has only scratched the surface of what Jenkins can do. Jenkins is a powerful tool that can be used to automate almost any aspect of your software development process.
Experiment more by creating more complex pipelines, integrating Jenkins with other tools, and exploring the Jenkins documentation to learn more about Jenkins' capabilities.


